So…. This will be brief. I’m a very honest person, and refuse to only post my success stories and work I’m proud of. So here is Natalia. I had big hopes for Natalia. Splurged on accessories and outfits. Really put a lot of time into planning her entire persona. Her name is Russian for “born on Christmas Day”. She WAS going to be beautiful. Then I carved her. I worked on her for weeks. And I gotta tell ya…. I did terrible! her face up was terrible from the beginning but then I kept trying to fix it and I only made it worse and worse every time. I give up, and I am ready to move on to my next girl!
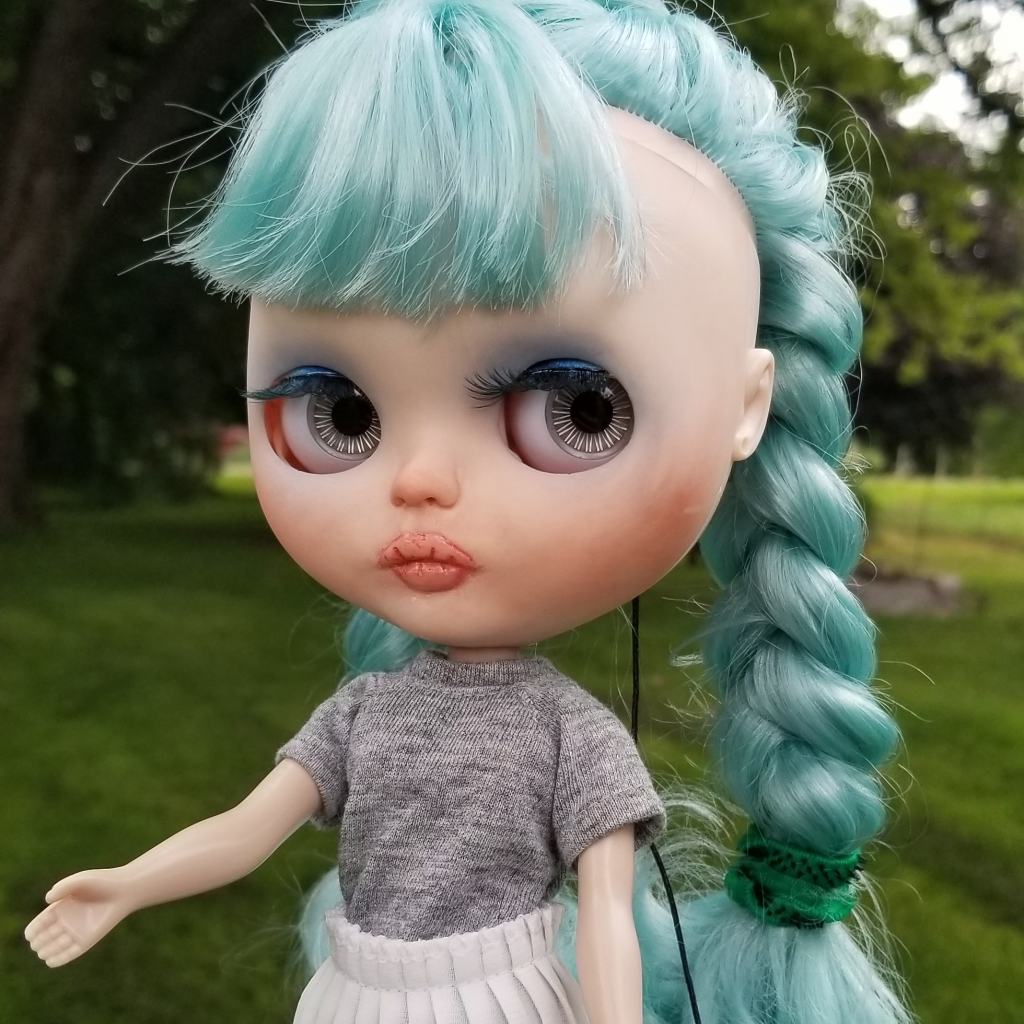
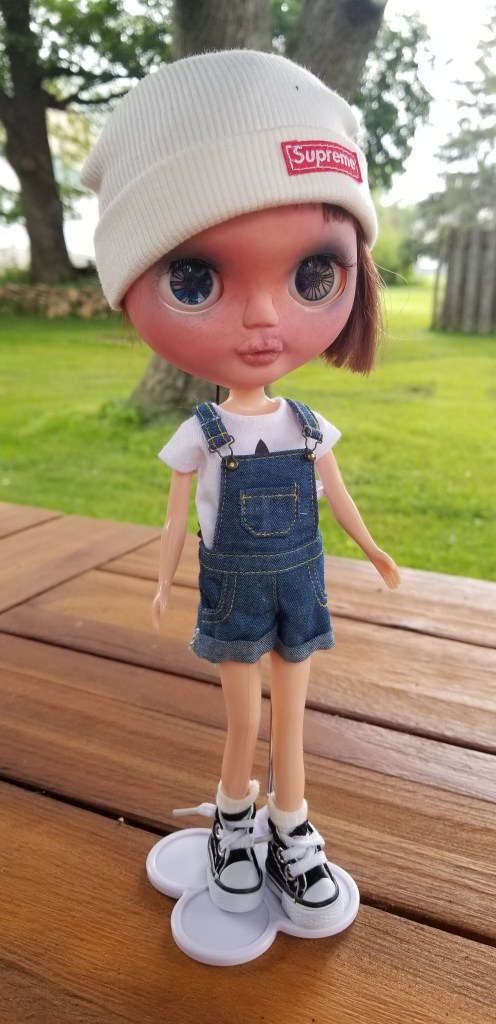
This is Dechen before her makeover. She started out already beautiful!
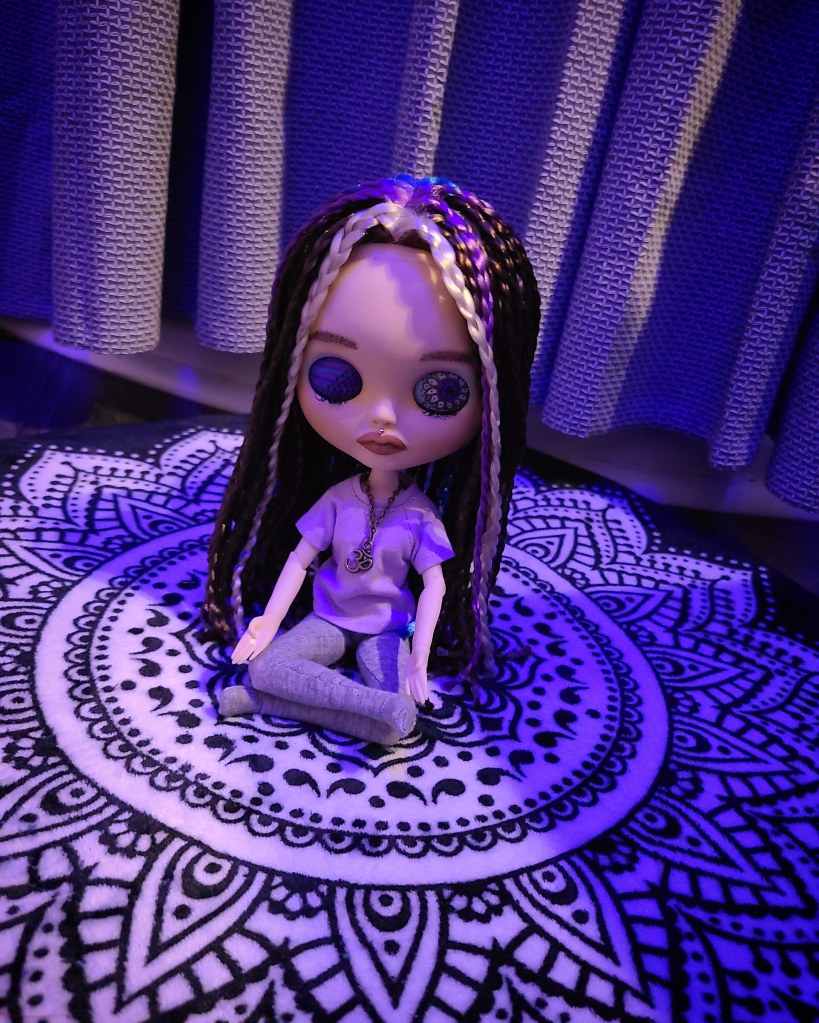
Dechen is a Buddhist name that means “one who can reach out for happiness and joy”. I realize how this may sound, but she literally exudes peace. I can be super stressed out and anxious, and simply picking her up and holding her in my hands causes a calmness and inner peace that I cannot explain. I love her!!!
She is the first of her kind that I worked on- factory doll (not an official Blythe factory) with a jointed azone body. I would say the plastic on her was a lot easier to play with than the plastic on a real Blythe is.
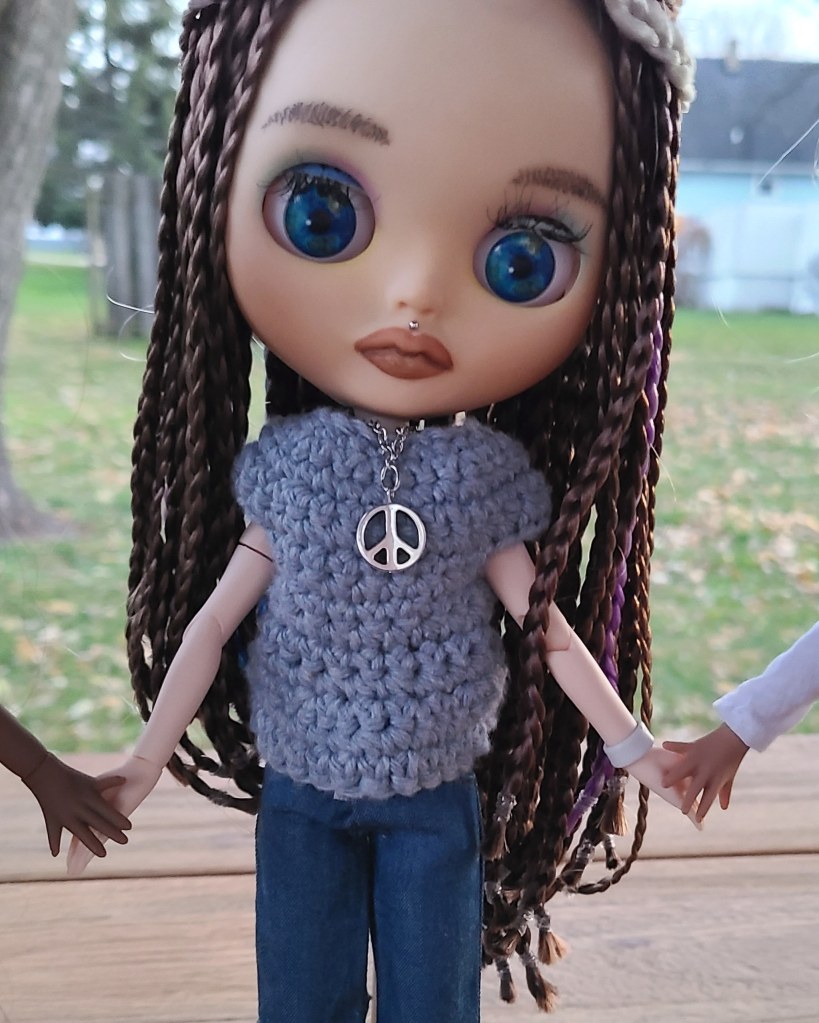
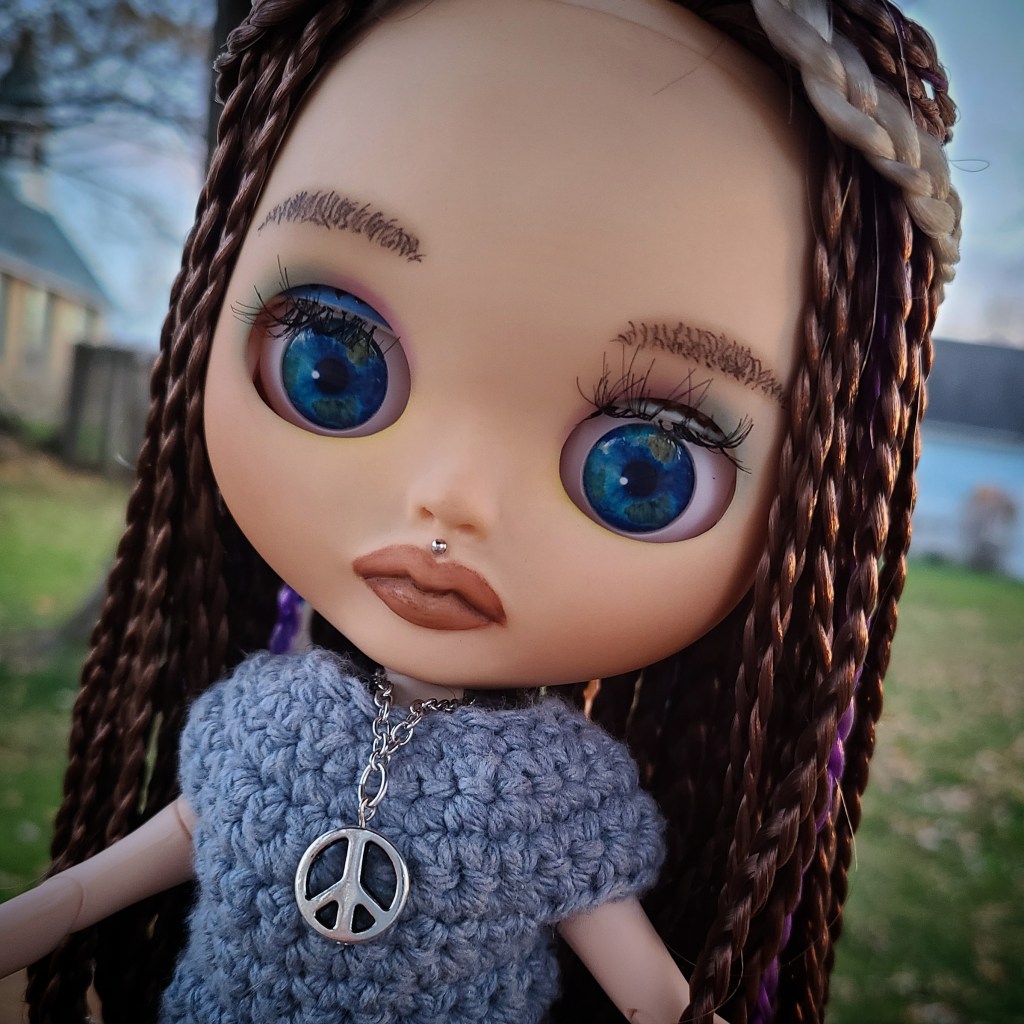
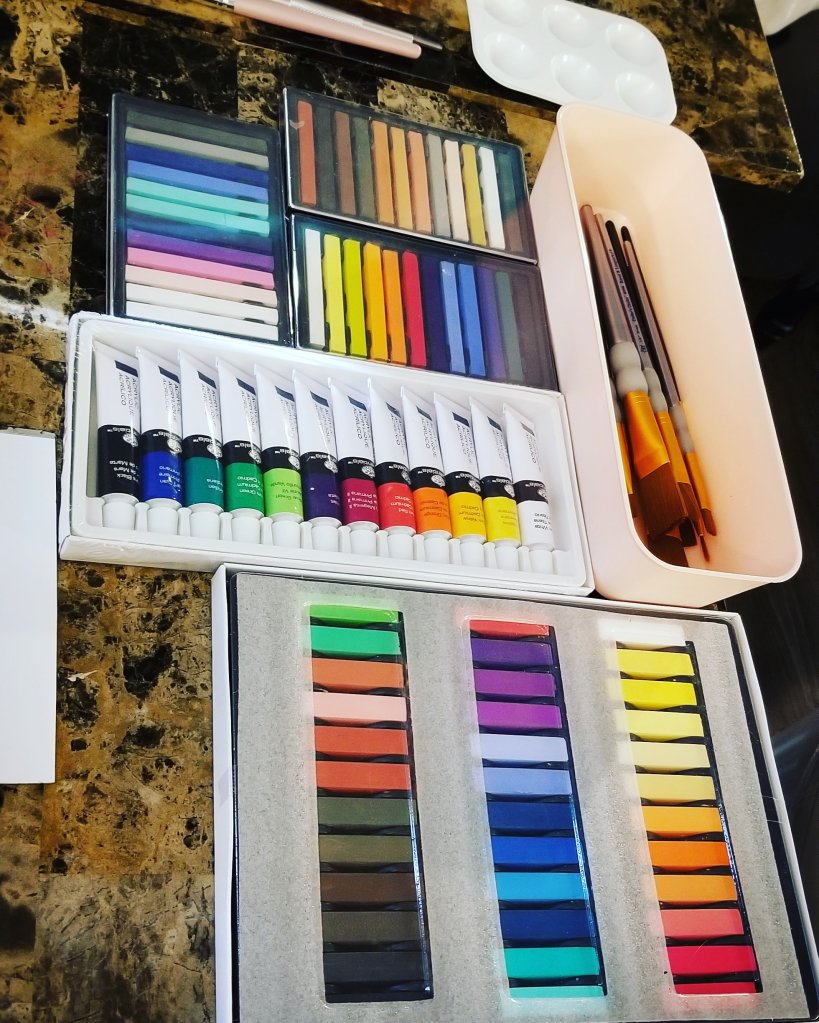
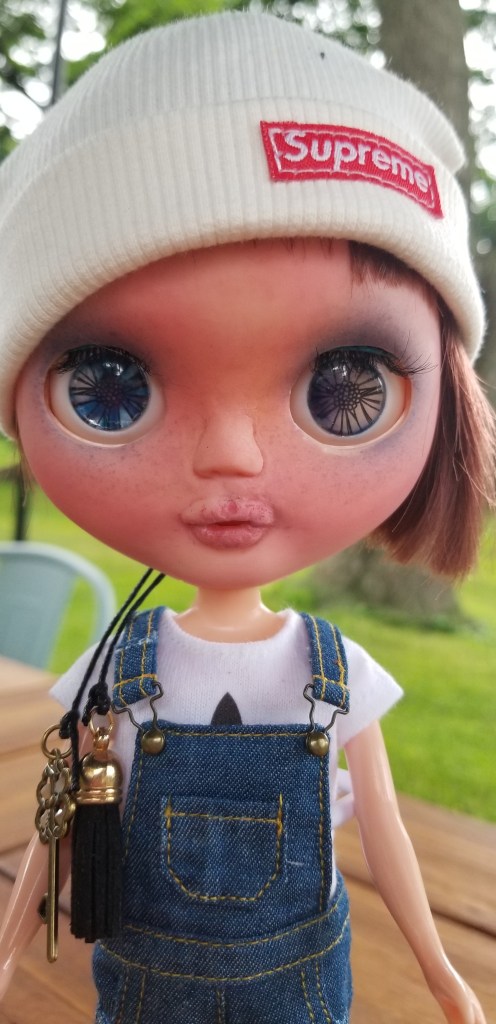
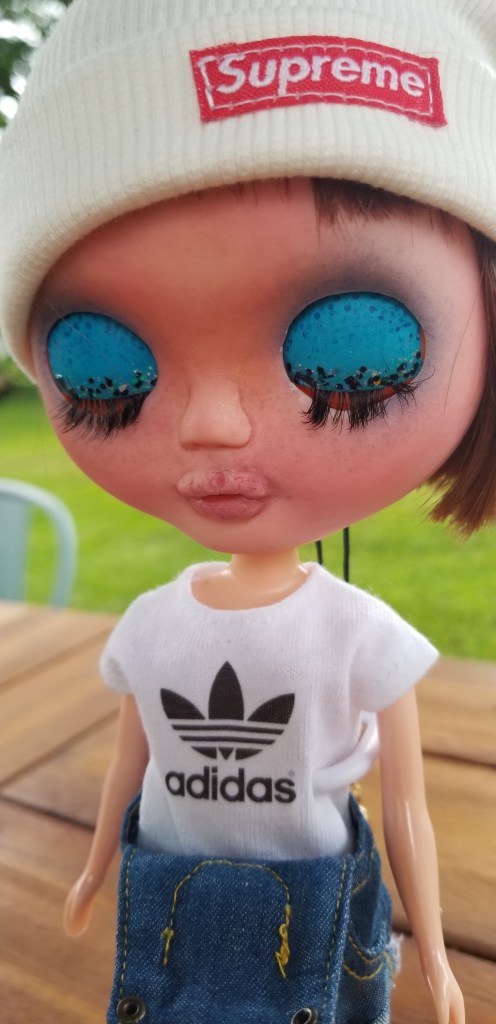
I did keep her customization simple, but she had all the normal face-up work: lip, nose, cheeks, chin, and philtrum carving, 4 new sets of eye chips, eye lash change, make up with chalk pastels, sealed with MSC, a new hairdo, painted eye lids, Medusa piercing, sleepy eye, slight gaze correction, neck tilt, and custom pull cords.
Let’s talk about her pull cord charms! She loves the simplicity of her “breathe” charm, and the “Positive” charm also sends a great message. Her favorites though are the cute little Buddha Charm, and the Ganesh (remover of obstacles) Charm.
Dechen practices Buddhism, and Mindfulness meditation plays an important role in her life.
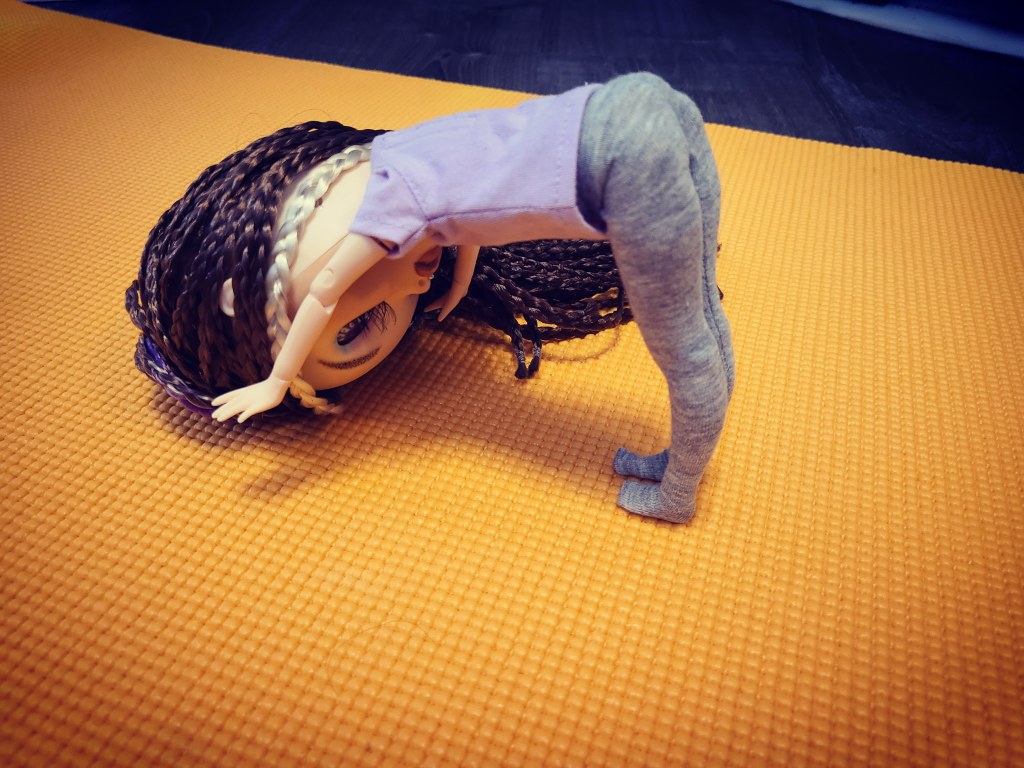
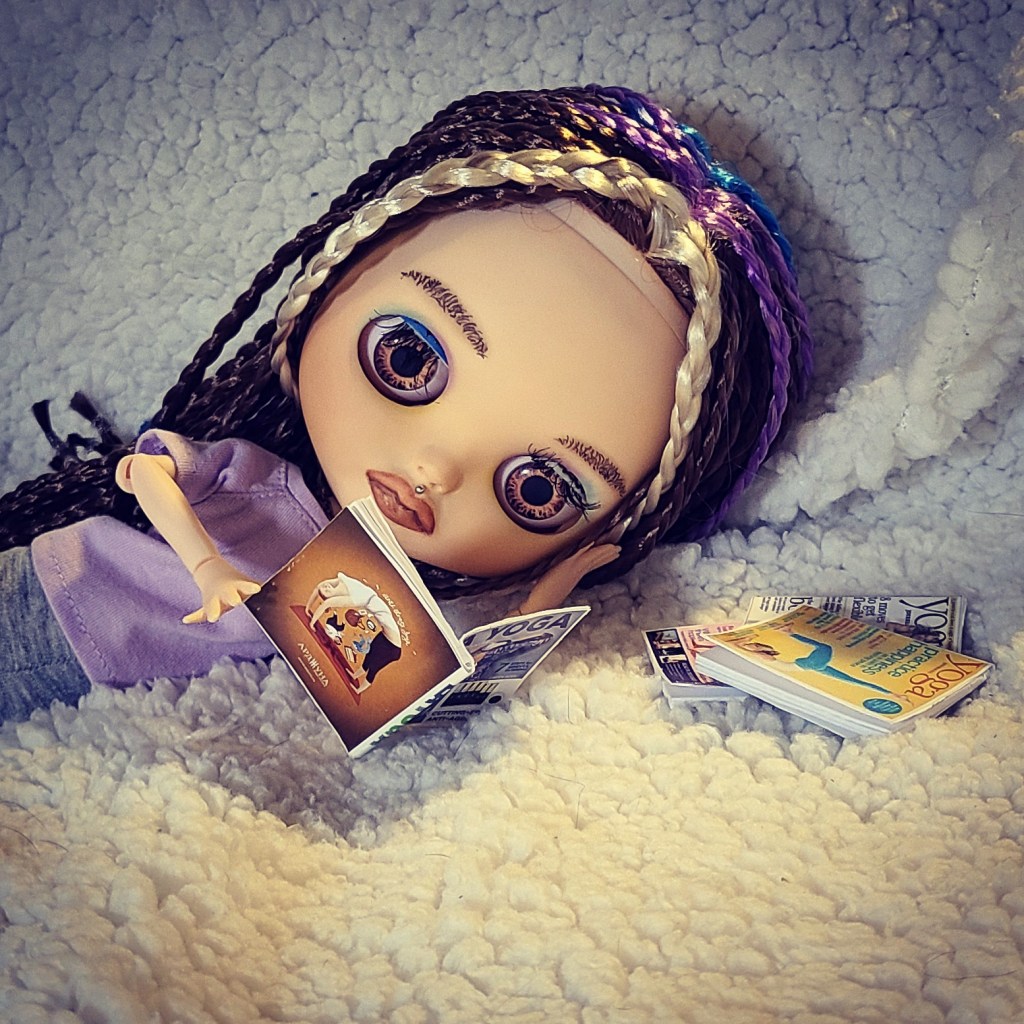
She also loves yoga! Here she can be seen in “downward dog” and a “child’s pose”.
Of course, relaxation is also a must!
Dechen truly stands by the Buddhist teaching that we are all connected, and in this life together.
Although she also has respect for herself, and for others, during these trying times.
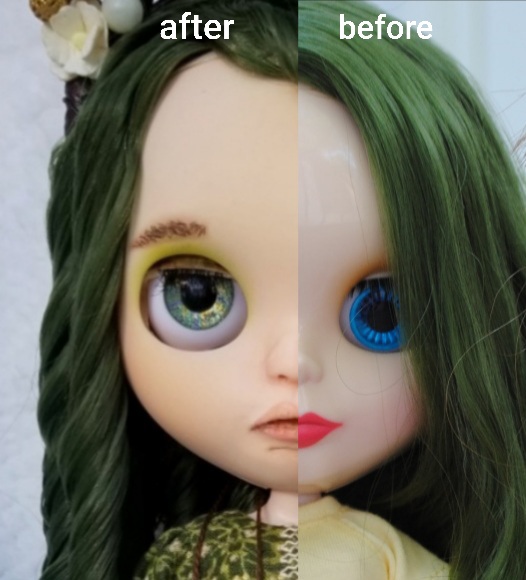
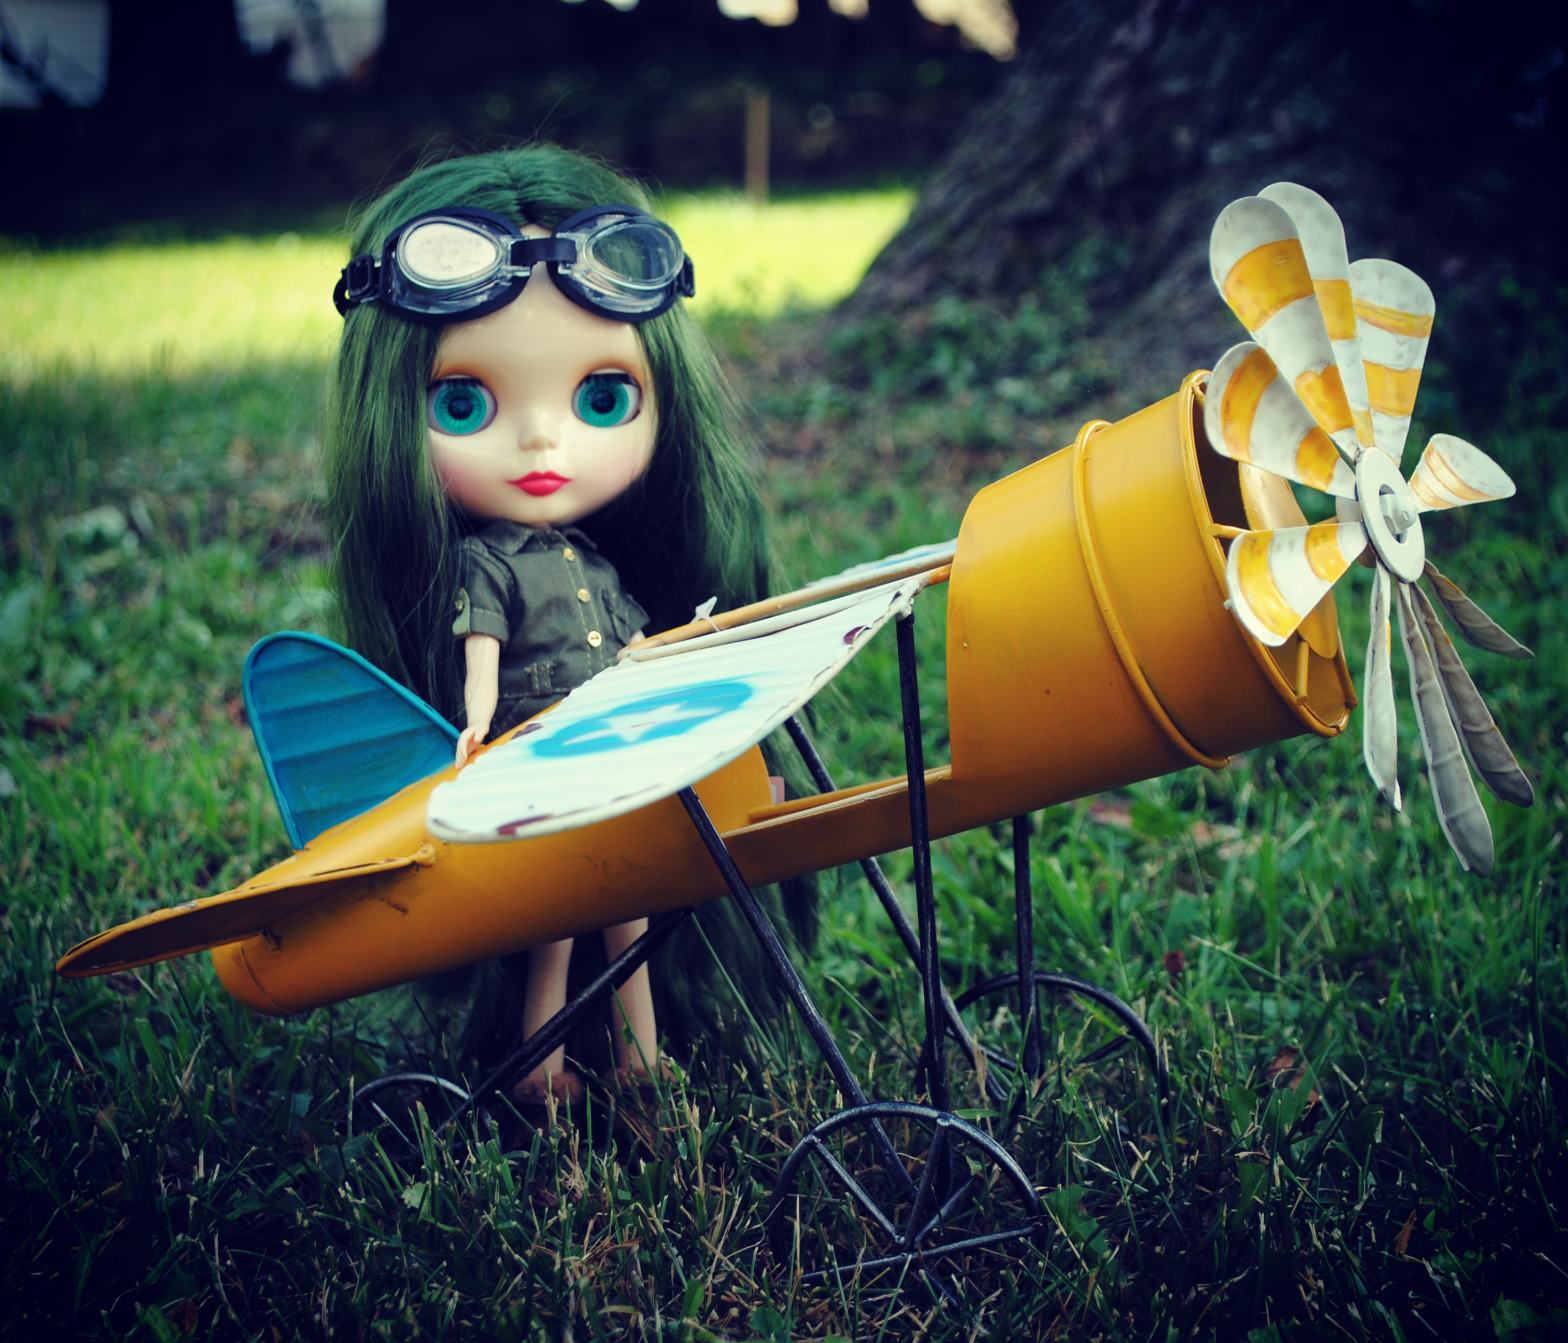
You met Olive pre face-up. She was already beautiful then, with her flowing green hair!
Olive is seen here with her best friend, Trixie.
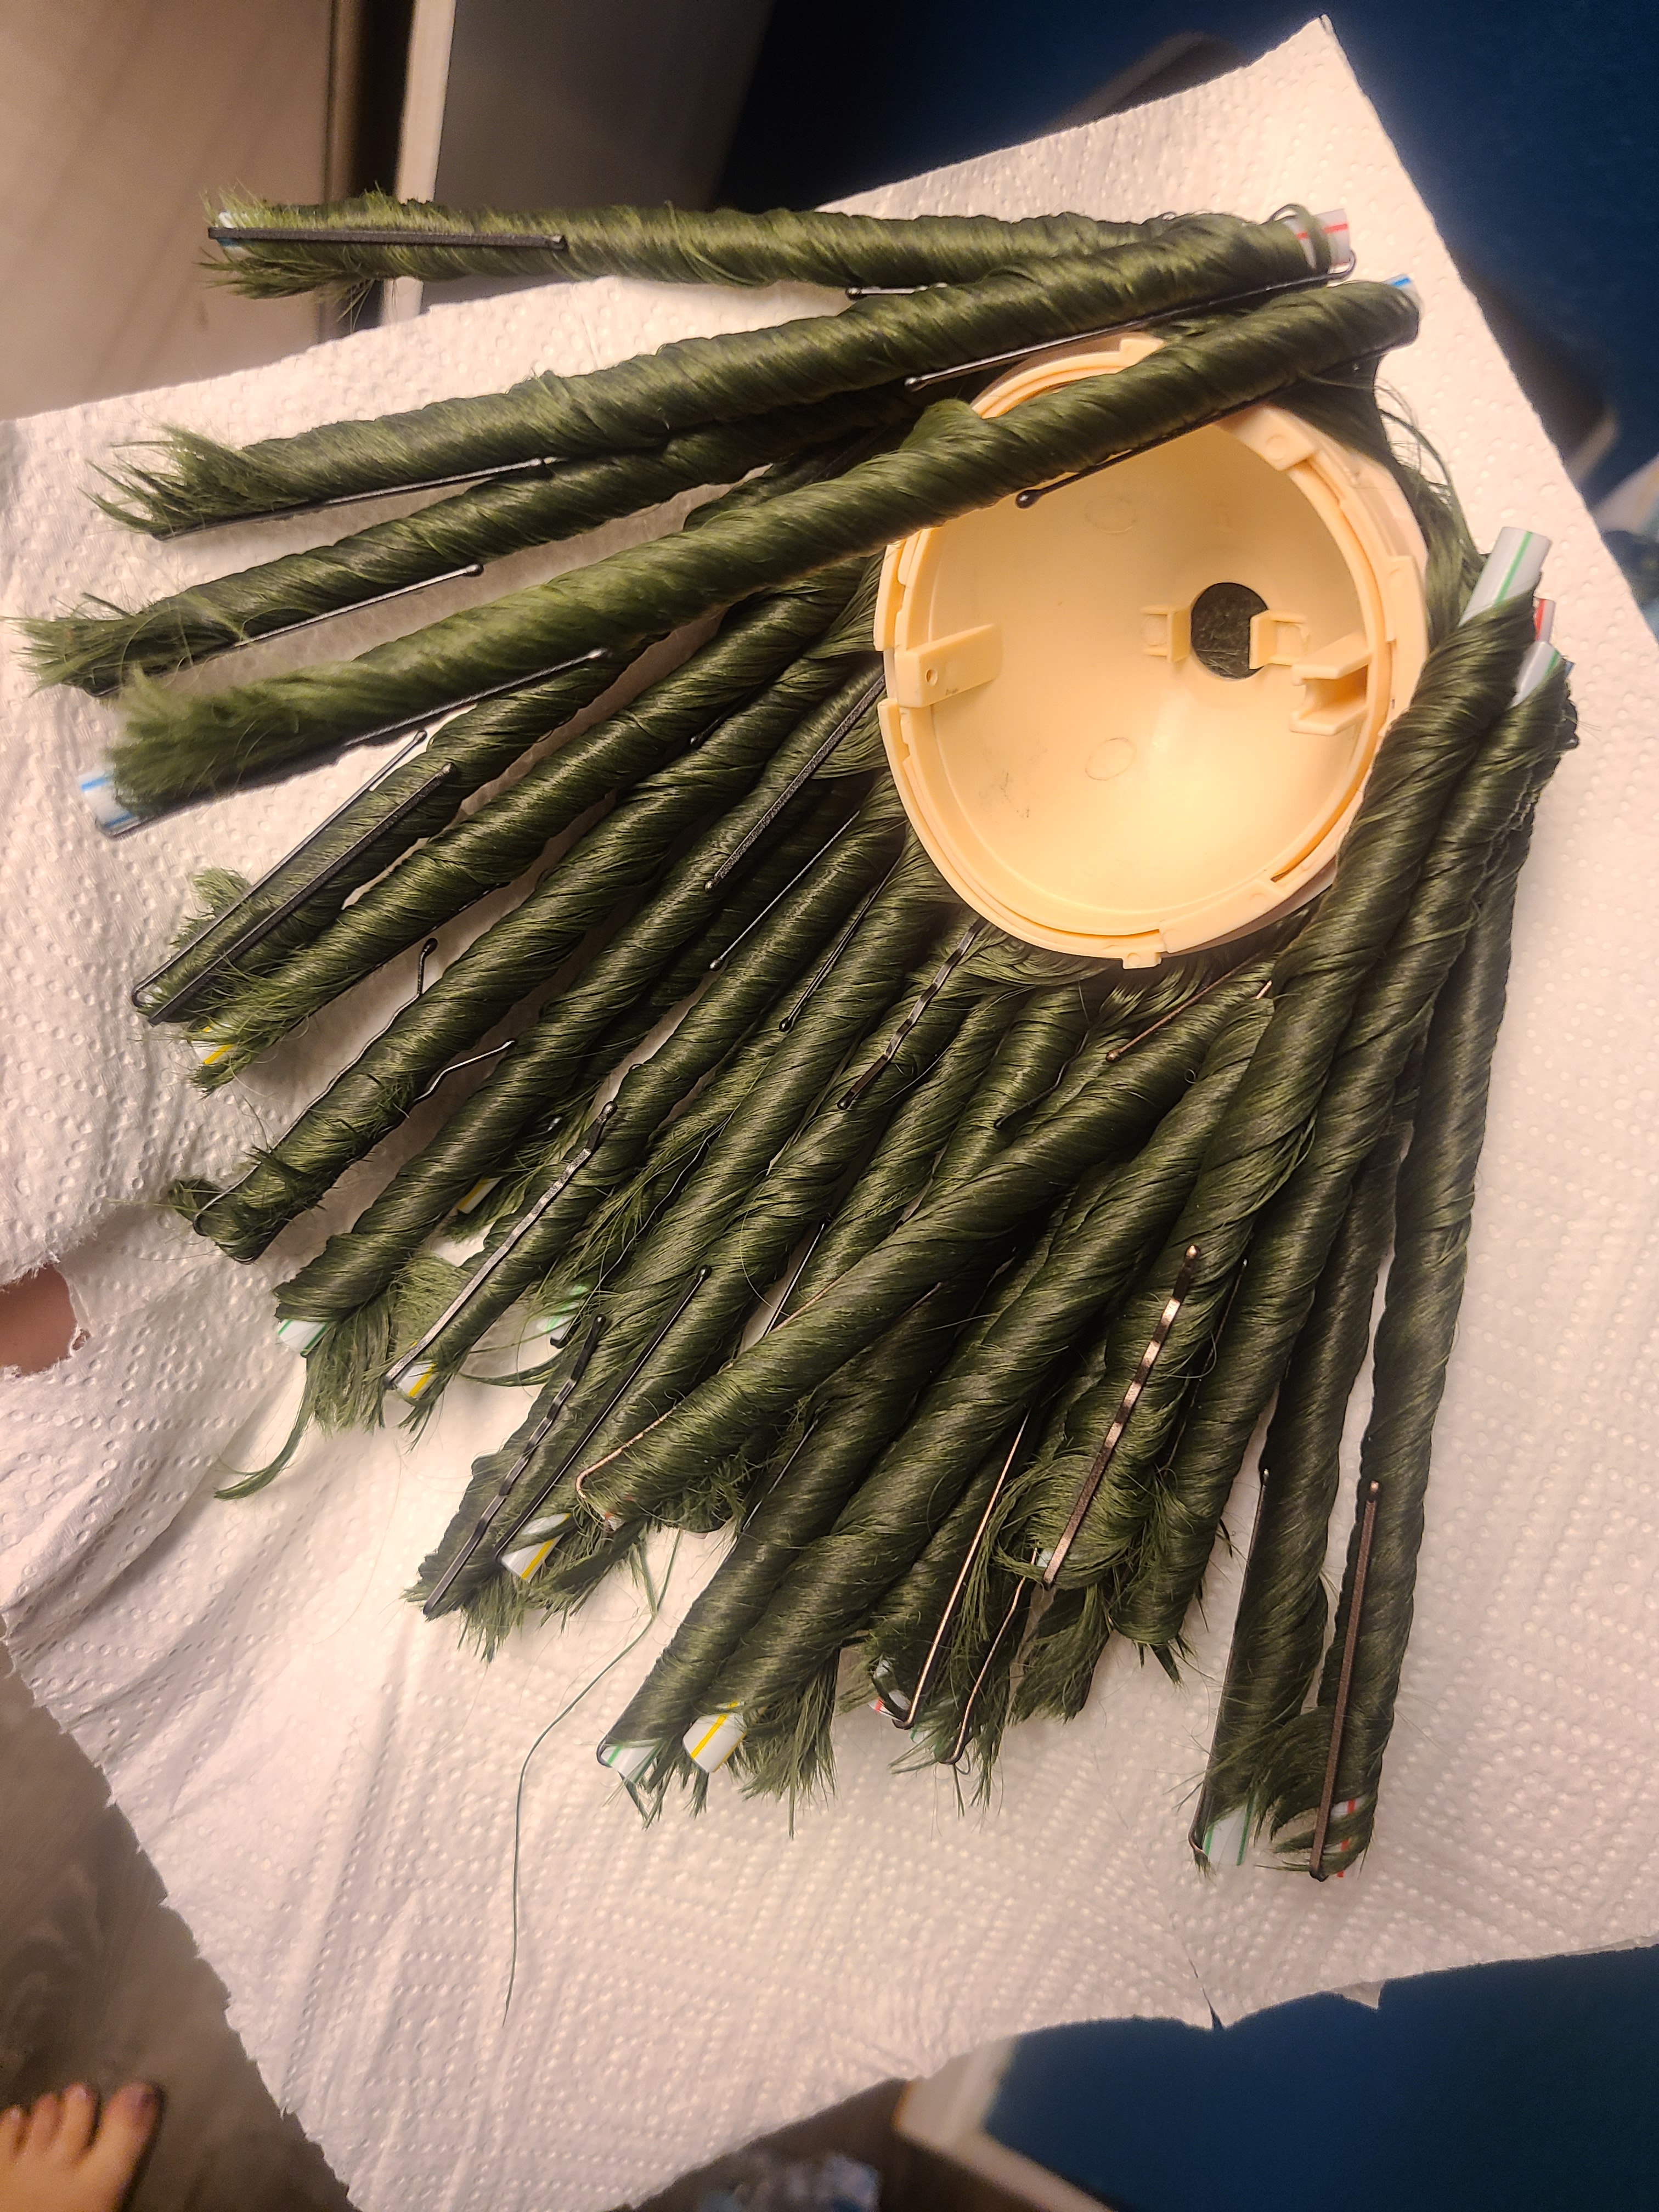
What you don’t see in that photo that was taken 8 years ago is that her hair became quite the rat’s nest, So to speak. Between allowing my then 5 year old daughter to play with her, and storing her in a bin for so long, she was nothing but knots.
The photo doesn’t do the knots justice.
I washed her hair so many times for so long and still couldn’t get a comb through it. Eventually, I got frustrated and just poured the fabric softener right on it and used it as a detangling cream. It took a while, but it worked! I changed her part best I could, then I wrapped the wet hair around straws and pinned it with Bobby pins.
Her hair still had a lot of the fabric softener in it, so more than once I re-rinsed in hot water with the “curlers” in. It sat like this for a total of a couple of weeks. Towards the end, I did also spray her with a heavy hairspray for good measure. The end result was EXACTLY what I was hoping for! She definitely still smells like fabric softener, which isn’t necessarily a bad thing.
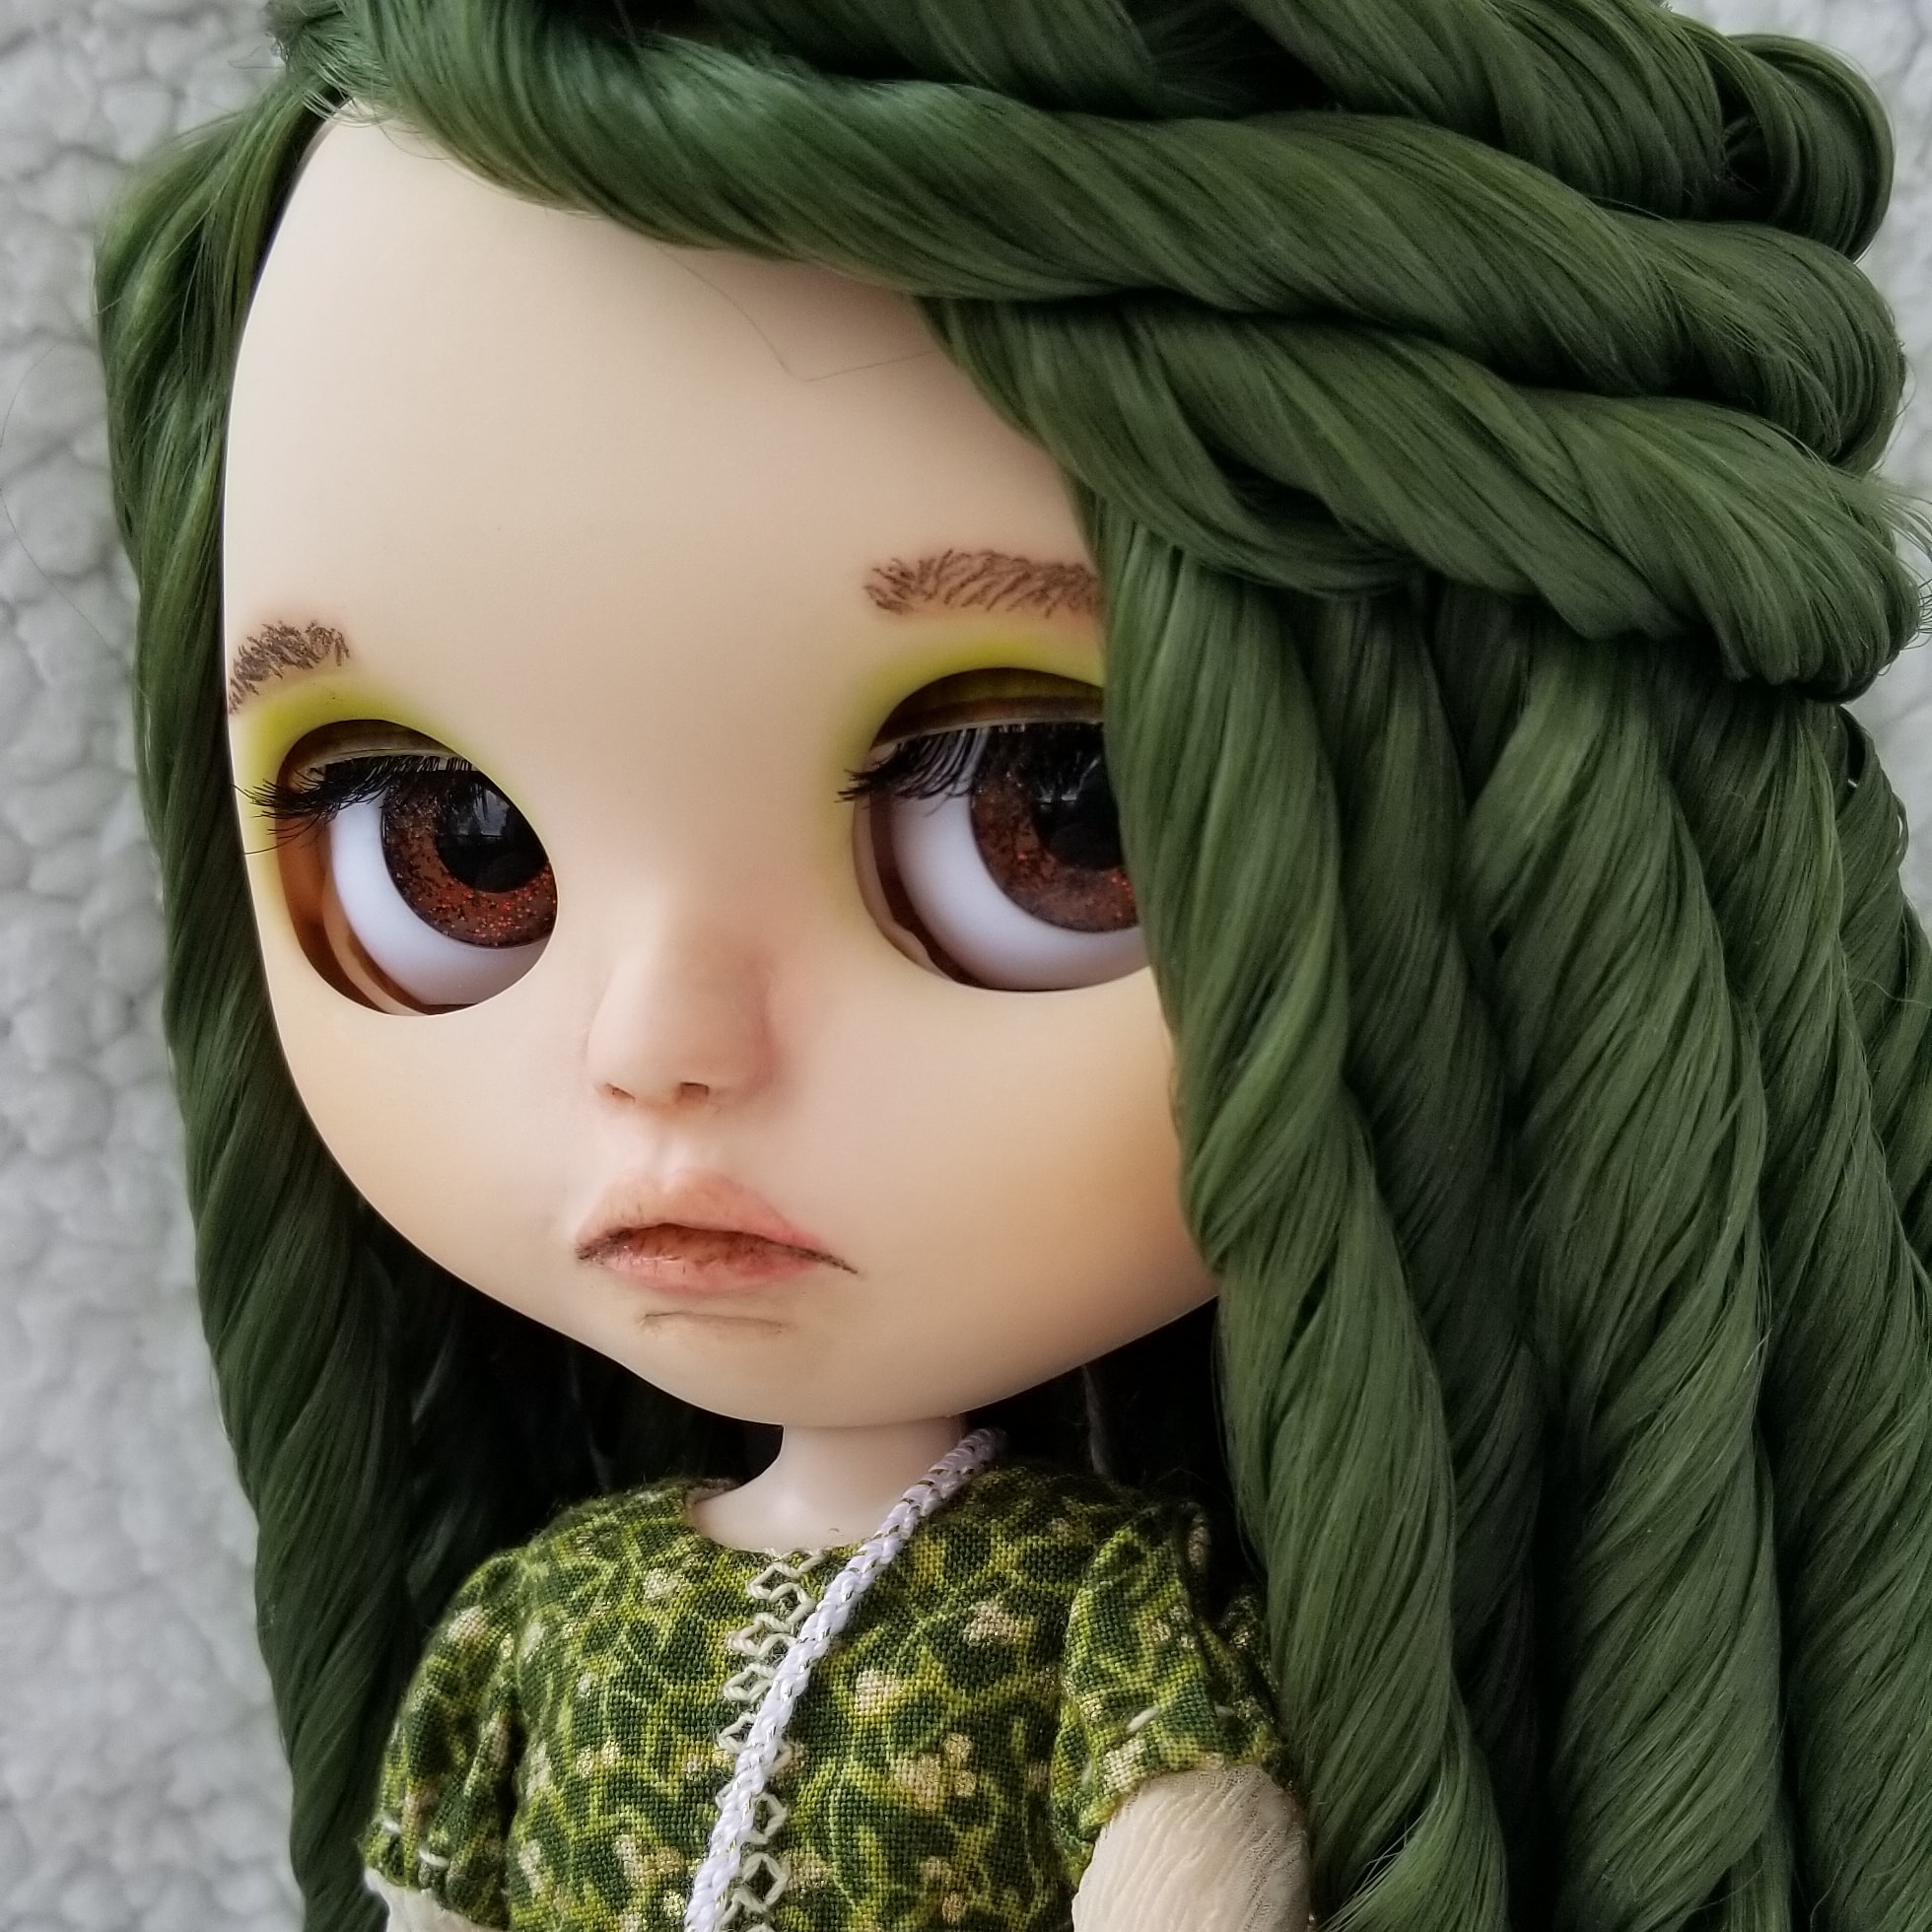
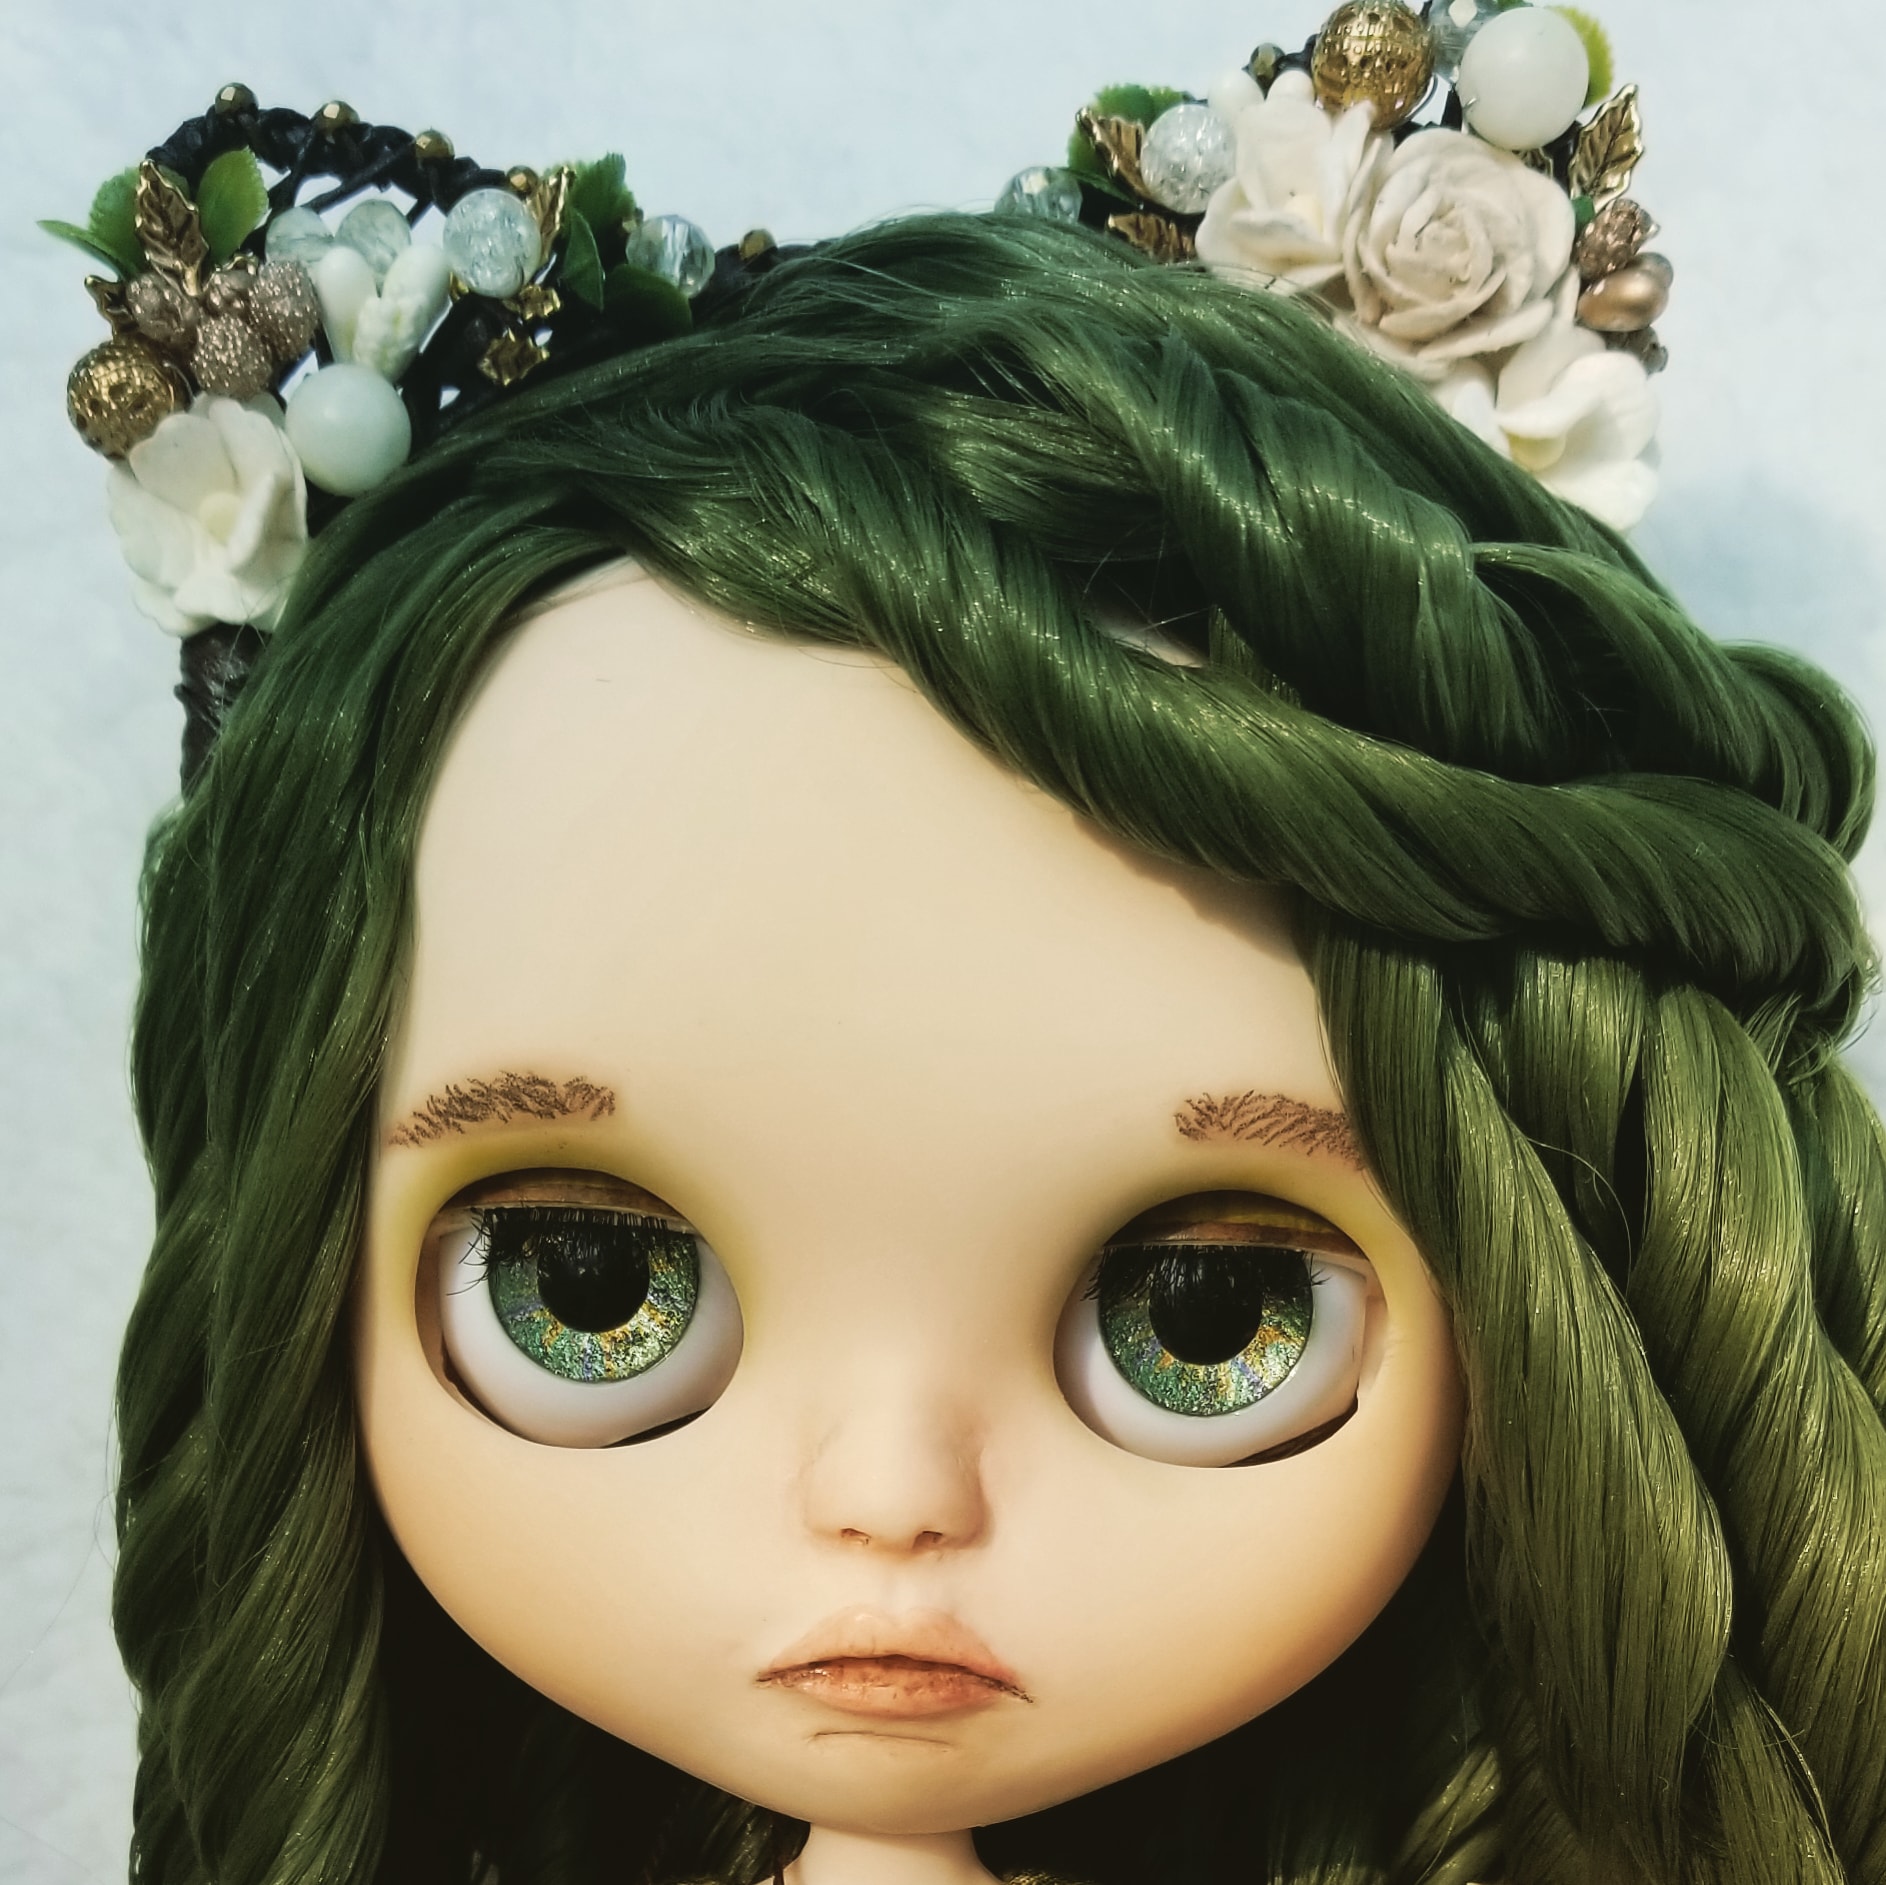
I am still in learning mode, so I’m not 100% happy with her carving work. Despite that, I am proud of how she turned out. I attempted my first slightly open mouth. I’m confused on how artists do a wide open mouth, as the large plastic pieces built into the inside of her faceplate would have prevented me from carving it any more open. The carving of her mouth took many, many hours.
Since she had a slightly open mouth, I thought I might as well make a couple of teeth for her to give that a go for the first time too! You can see her teeth in person, but not in her photographs, so I’ll share these photos I took while Still working on her.
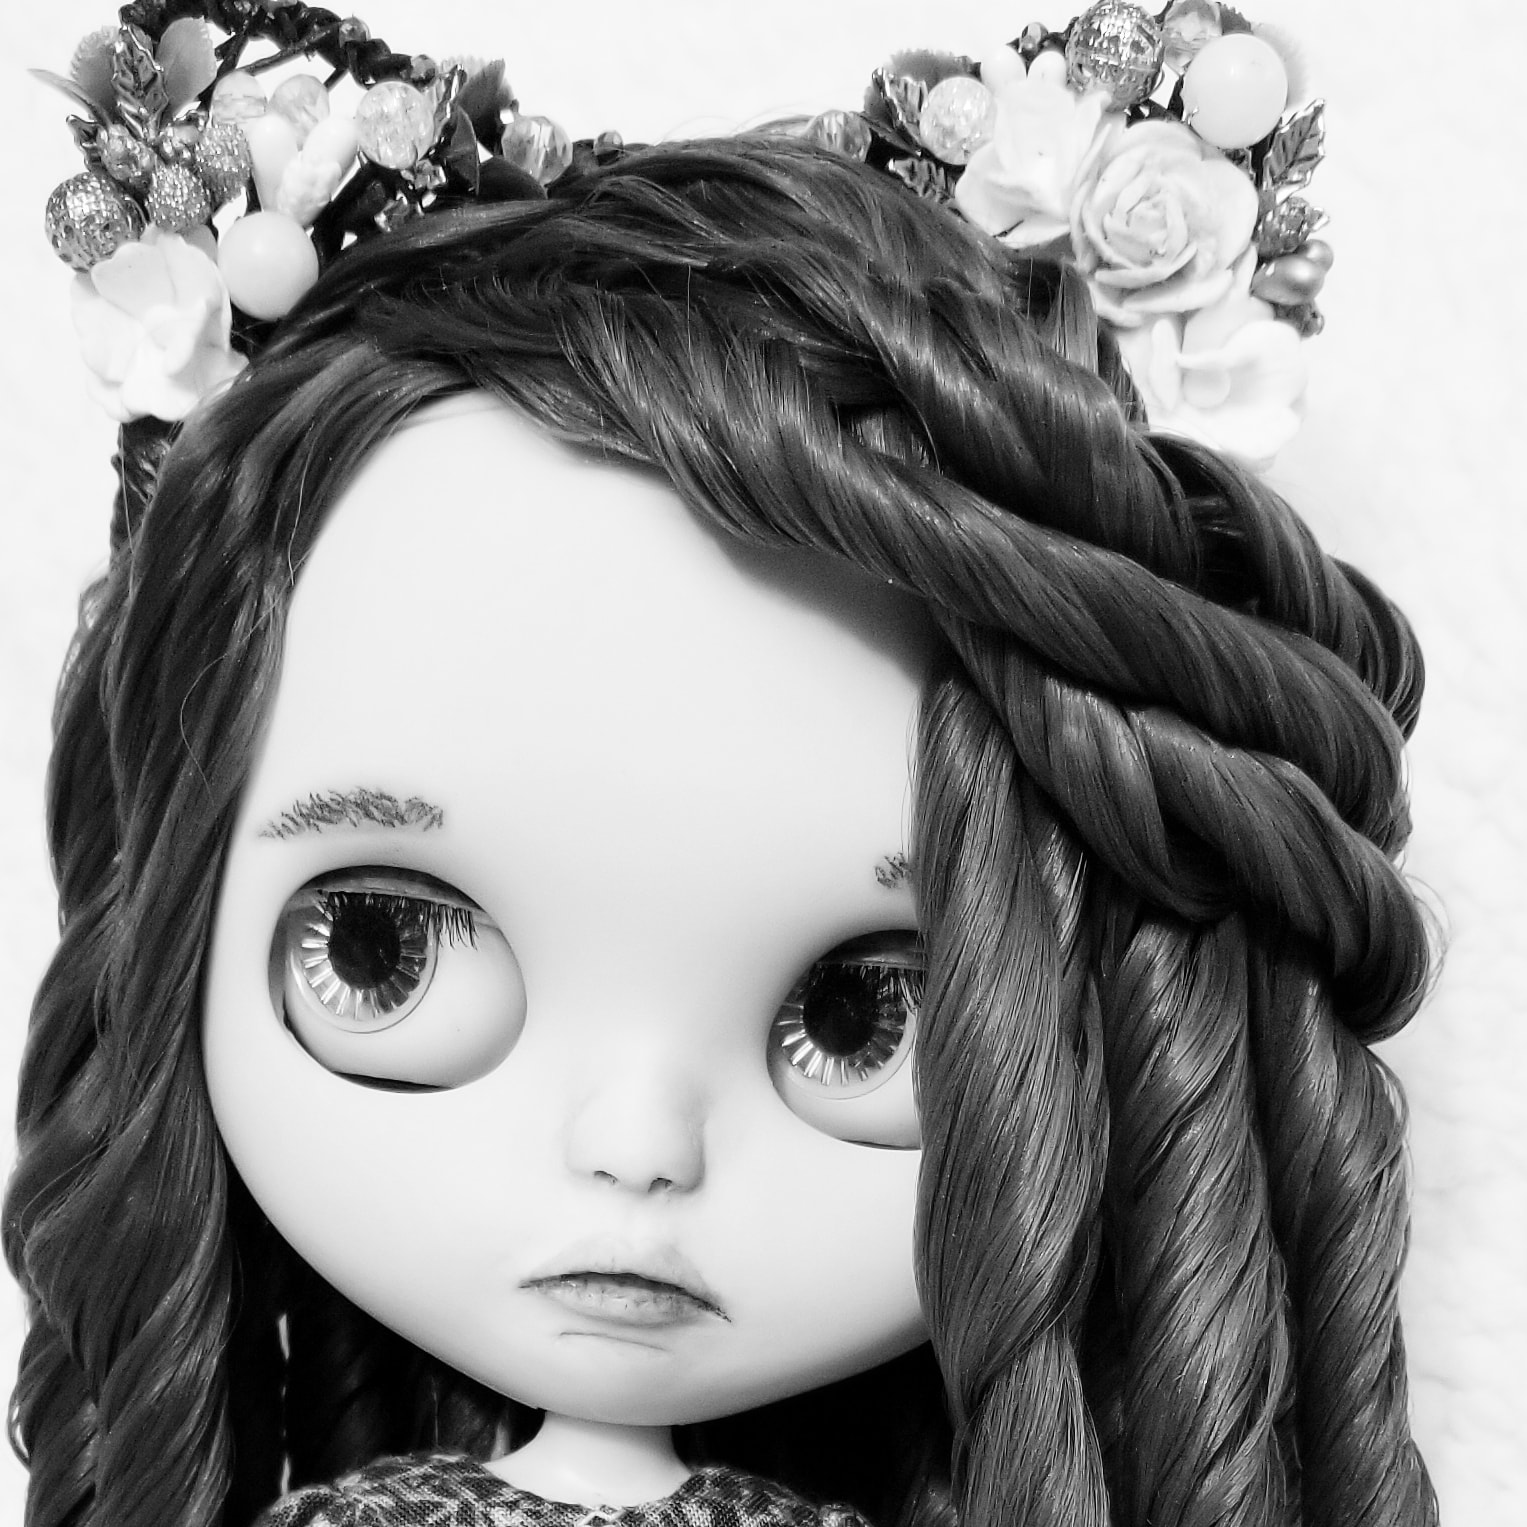
The extreme flash makes her makeup look terrible, I promise it’s just a bad photo. 😉
This was also my first time giving a Blythe doll eyebrows. I was so intimidated by the thought of this, but they turned out halfway decent. I cut the shape out on cardstock first, and used that as a template for the shading with chalk pastel. That way I could flip the cardstock for the other side so they matched in shape and size. Then I went over them with a colored pencil to add “hairs”.
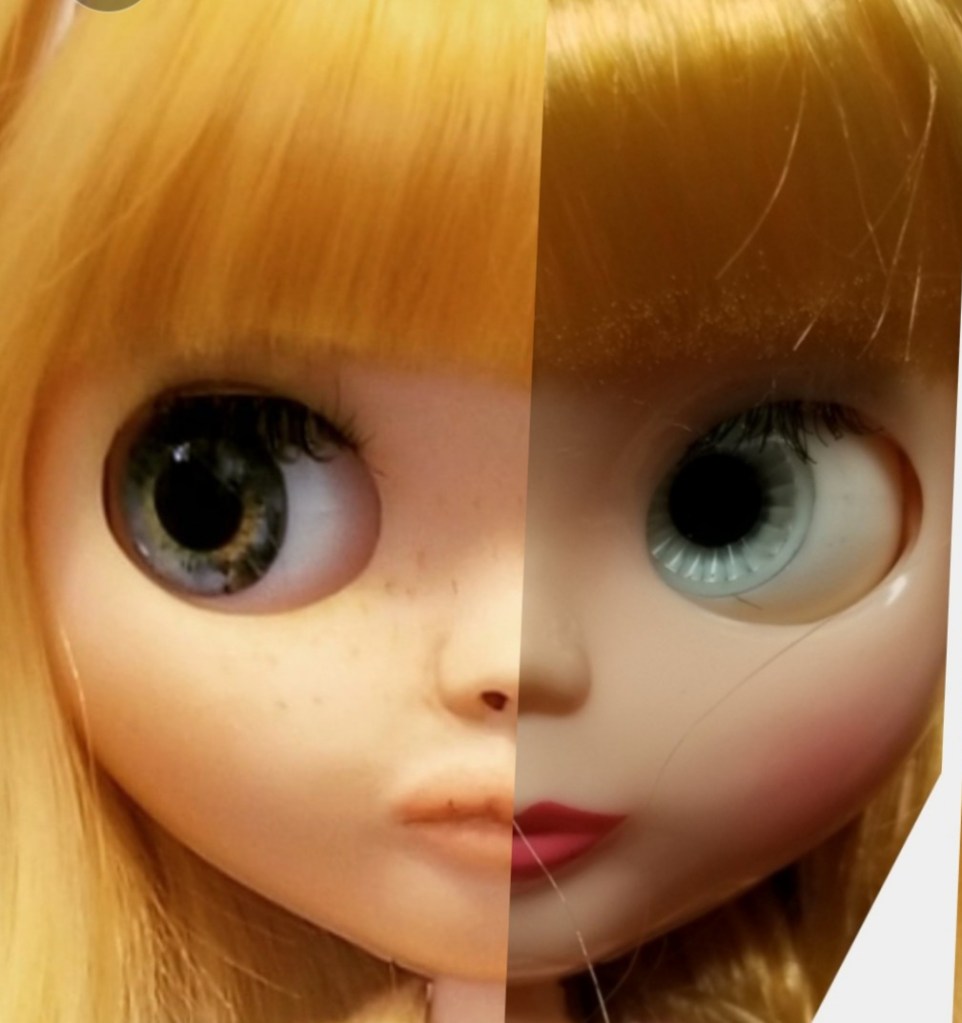
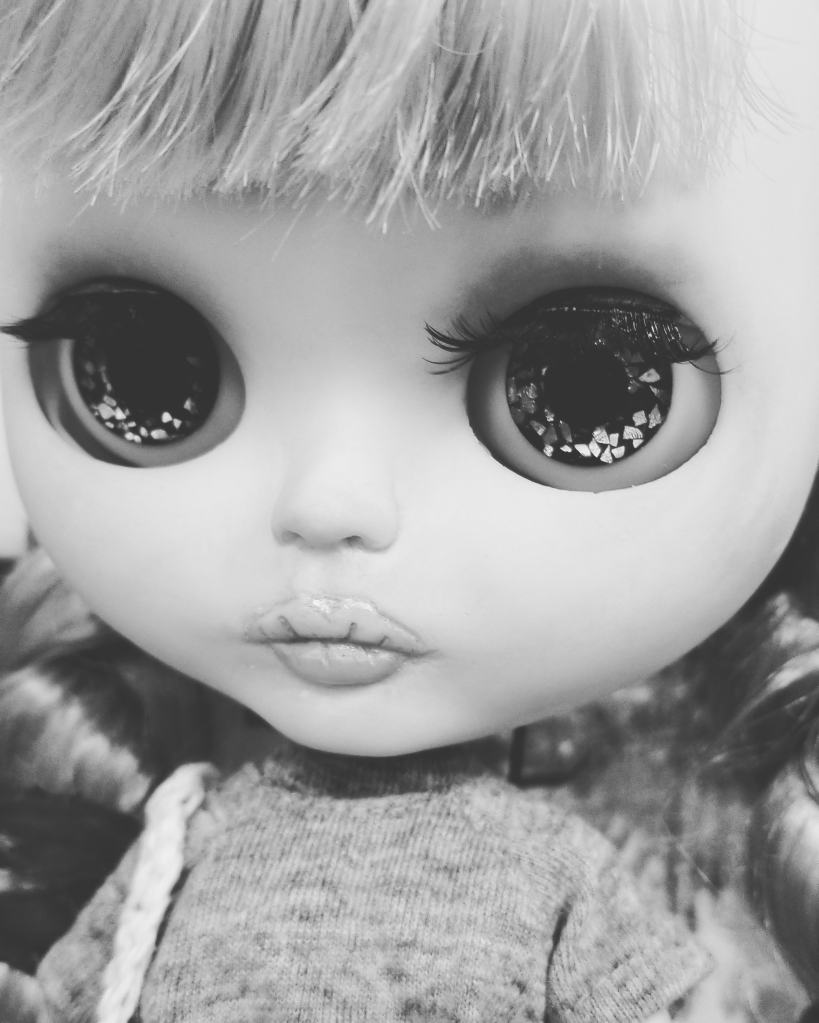
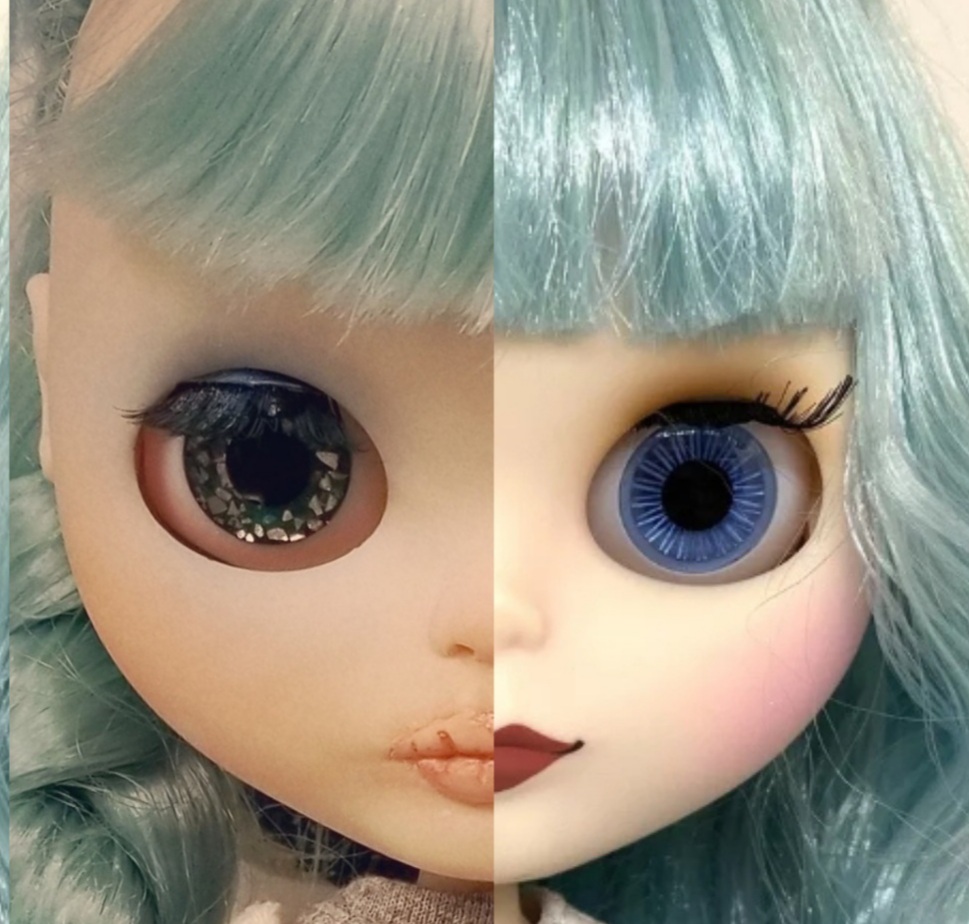
The photo above shows my hand painted eye chips. Another first! They sparkle a lot in real life.
I also used a pair of purchased eye chips (green) and then two Blythe stock eye chips. The yellow you’ll see in photos were originally hers, I didn’t mess with those at all. Then the peach ones, which you won’t see, I screwed up. They were from another stock doll (Story’s Emily) and I accidently used too much glue so they are spotted and cloudy. Bummer. But hey- three out of four sets look great! Did I mention I’m still learning? Trial and error!
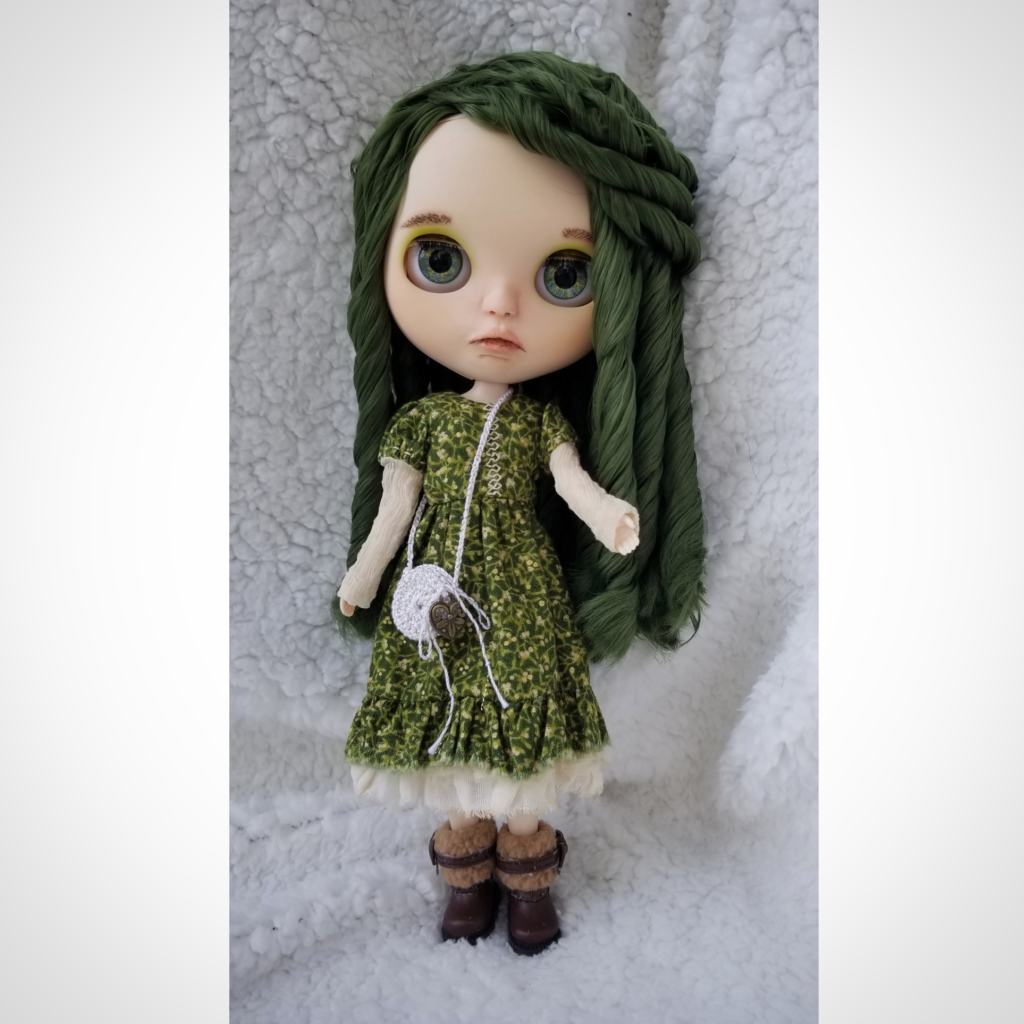
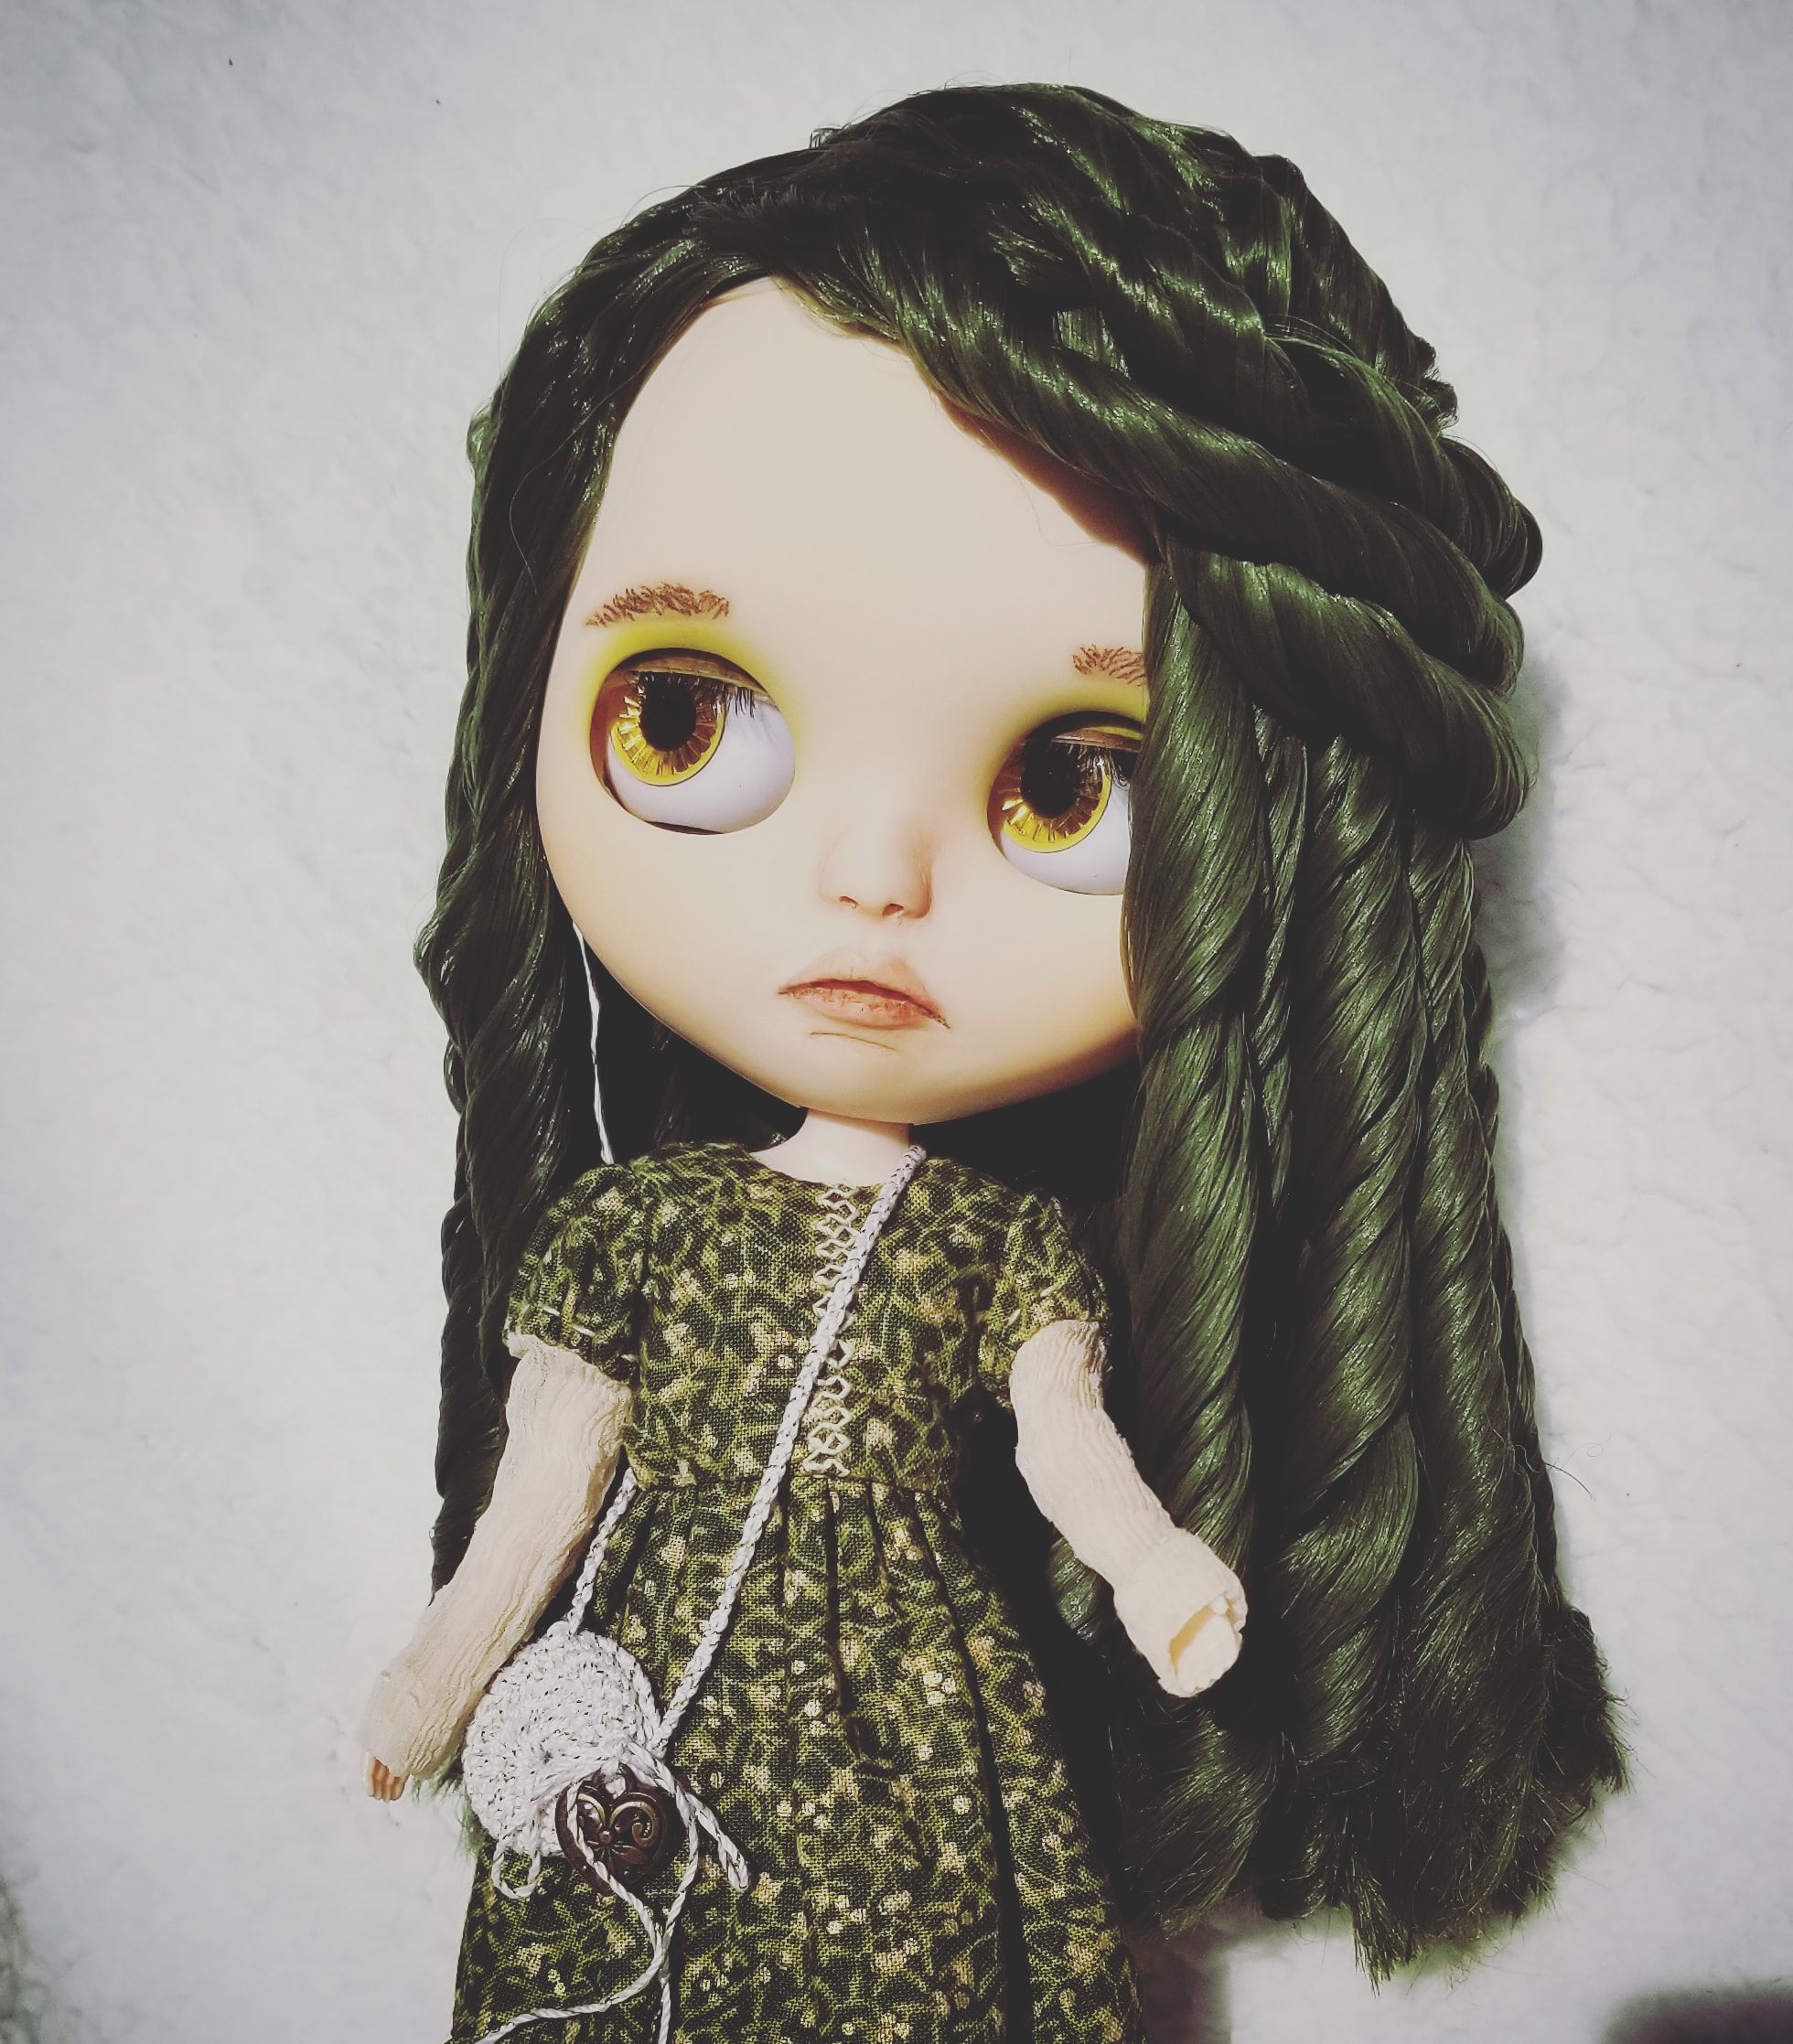
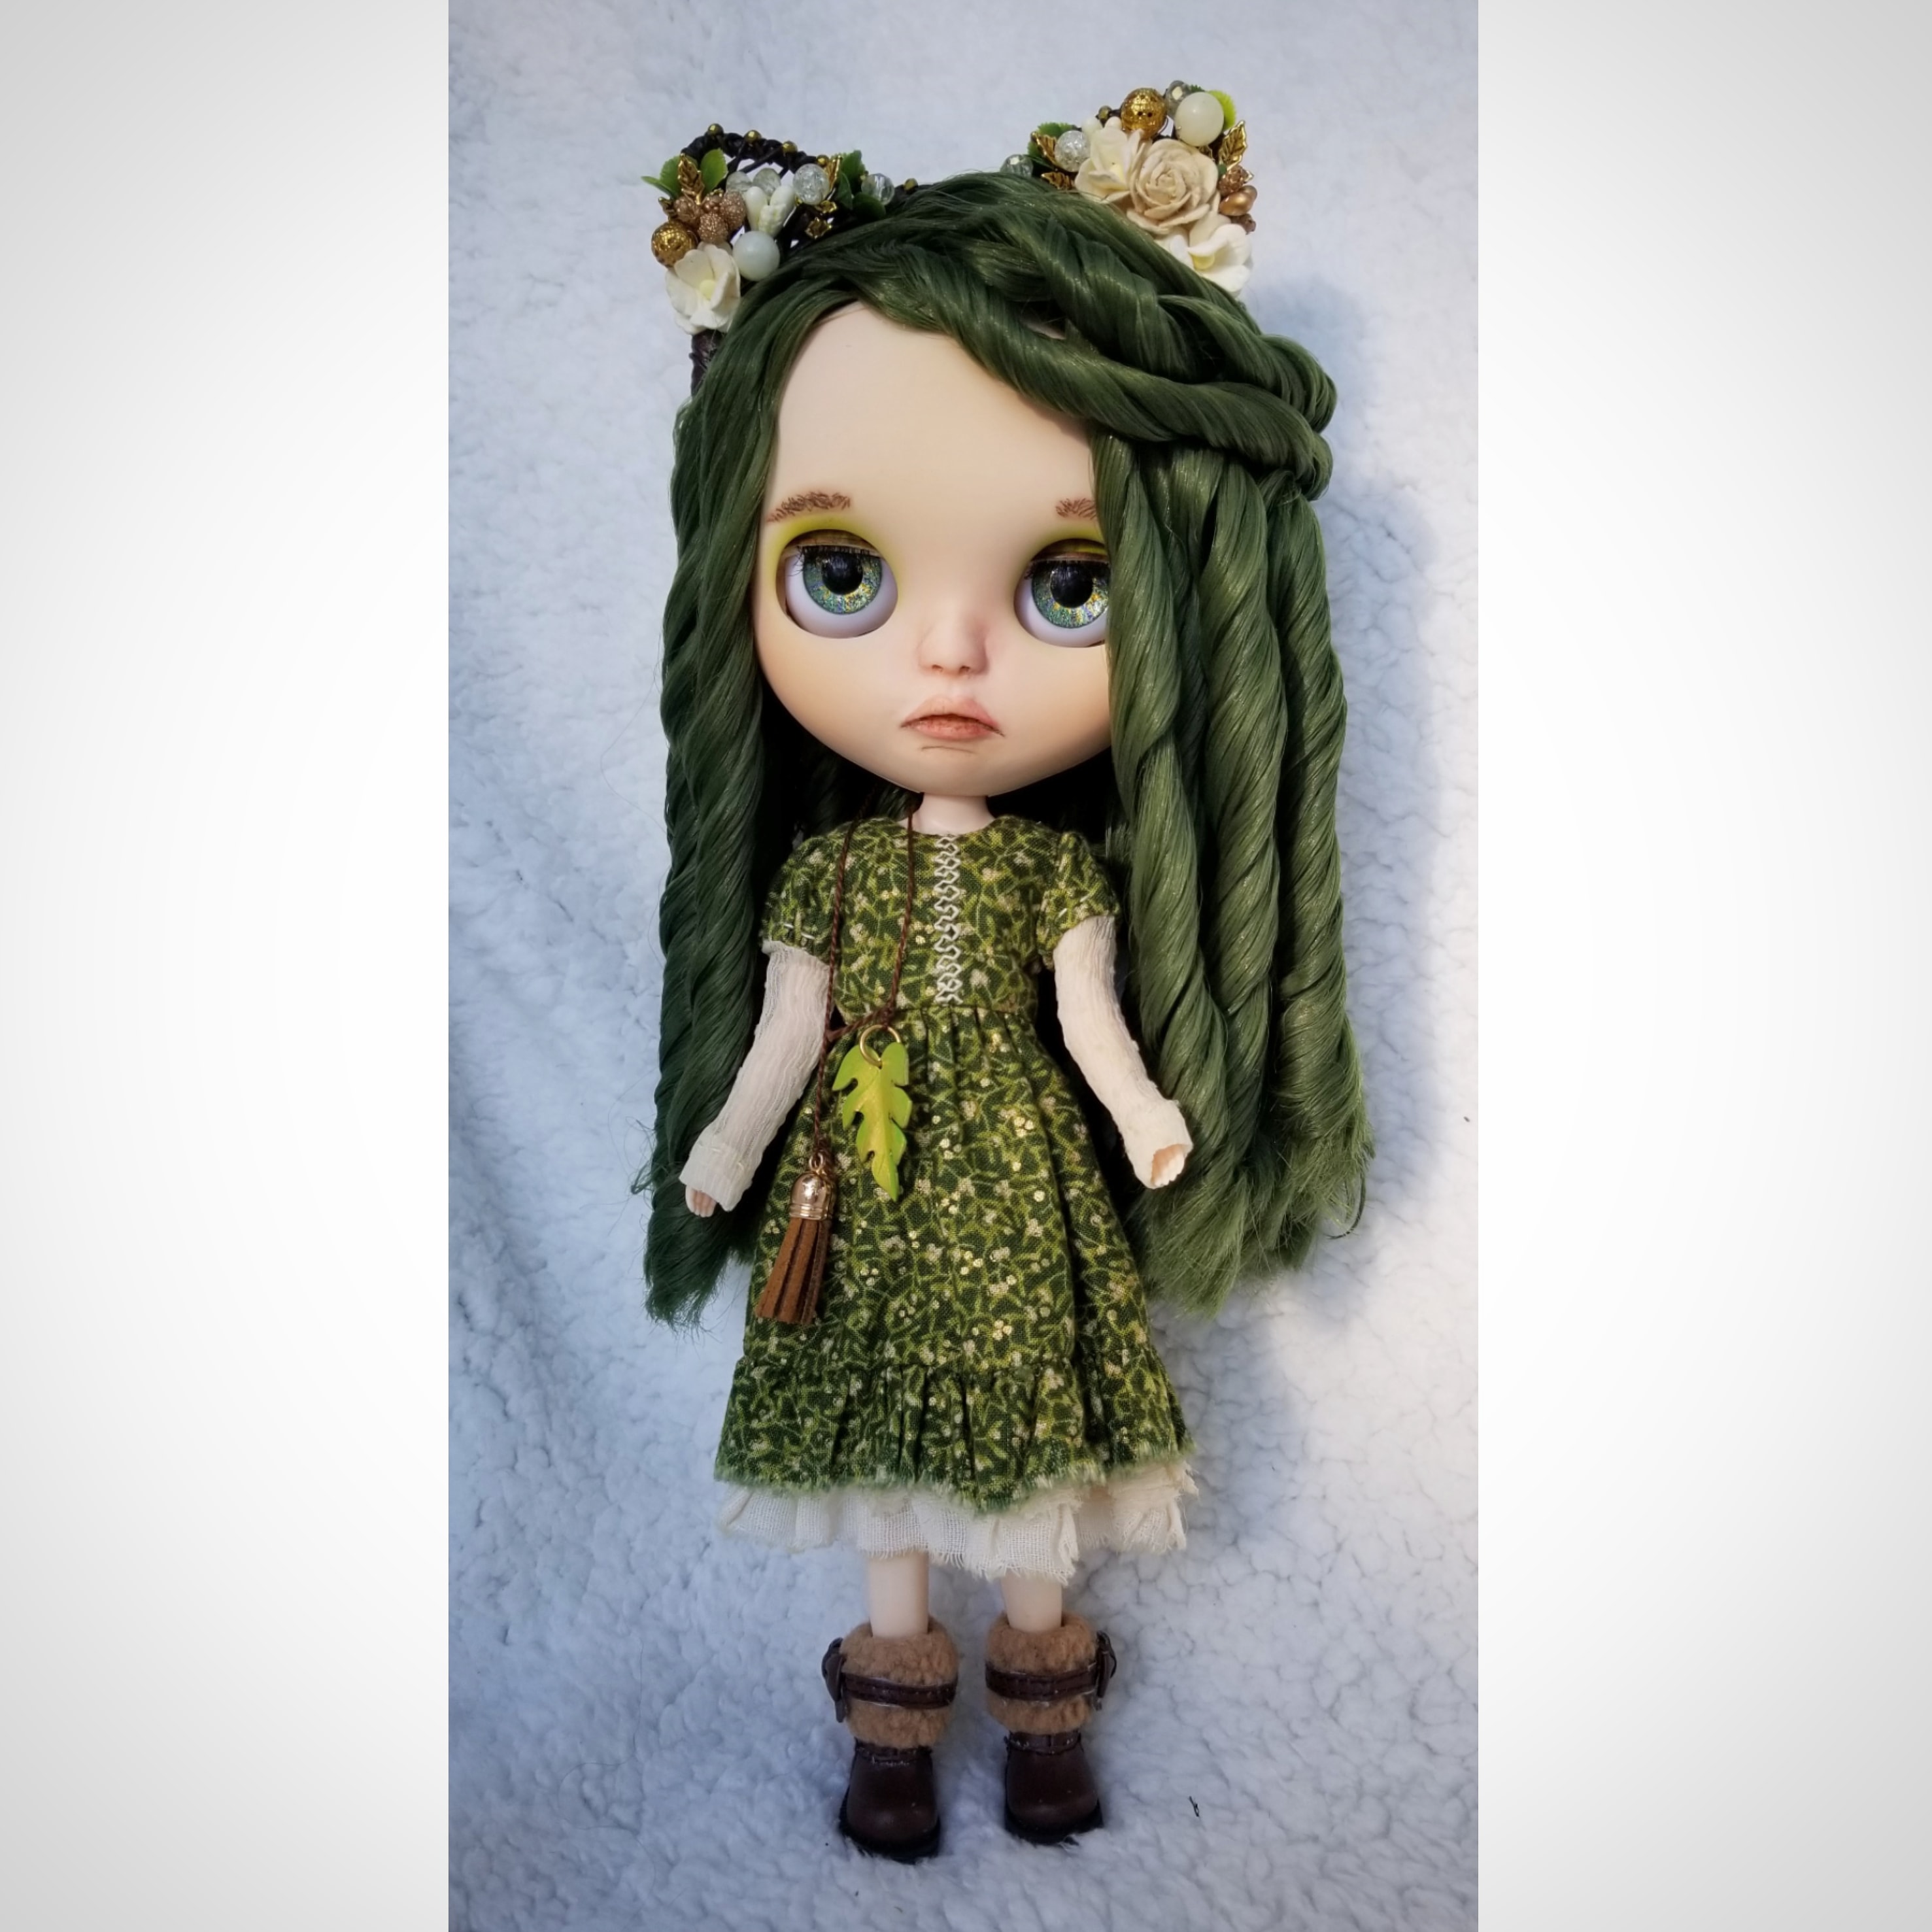
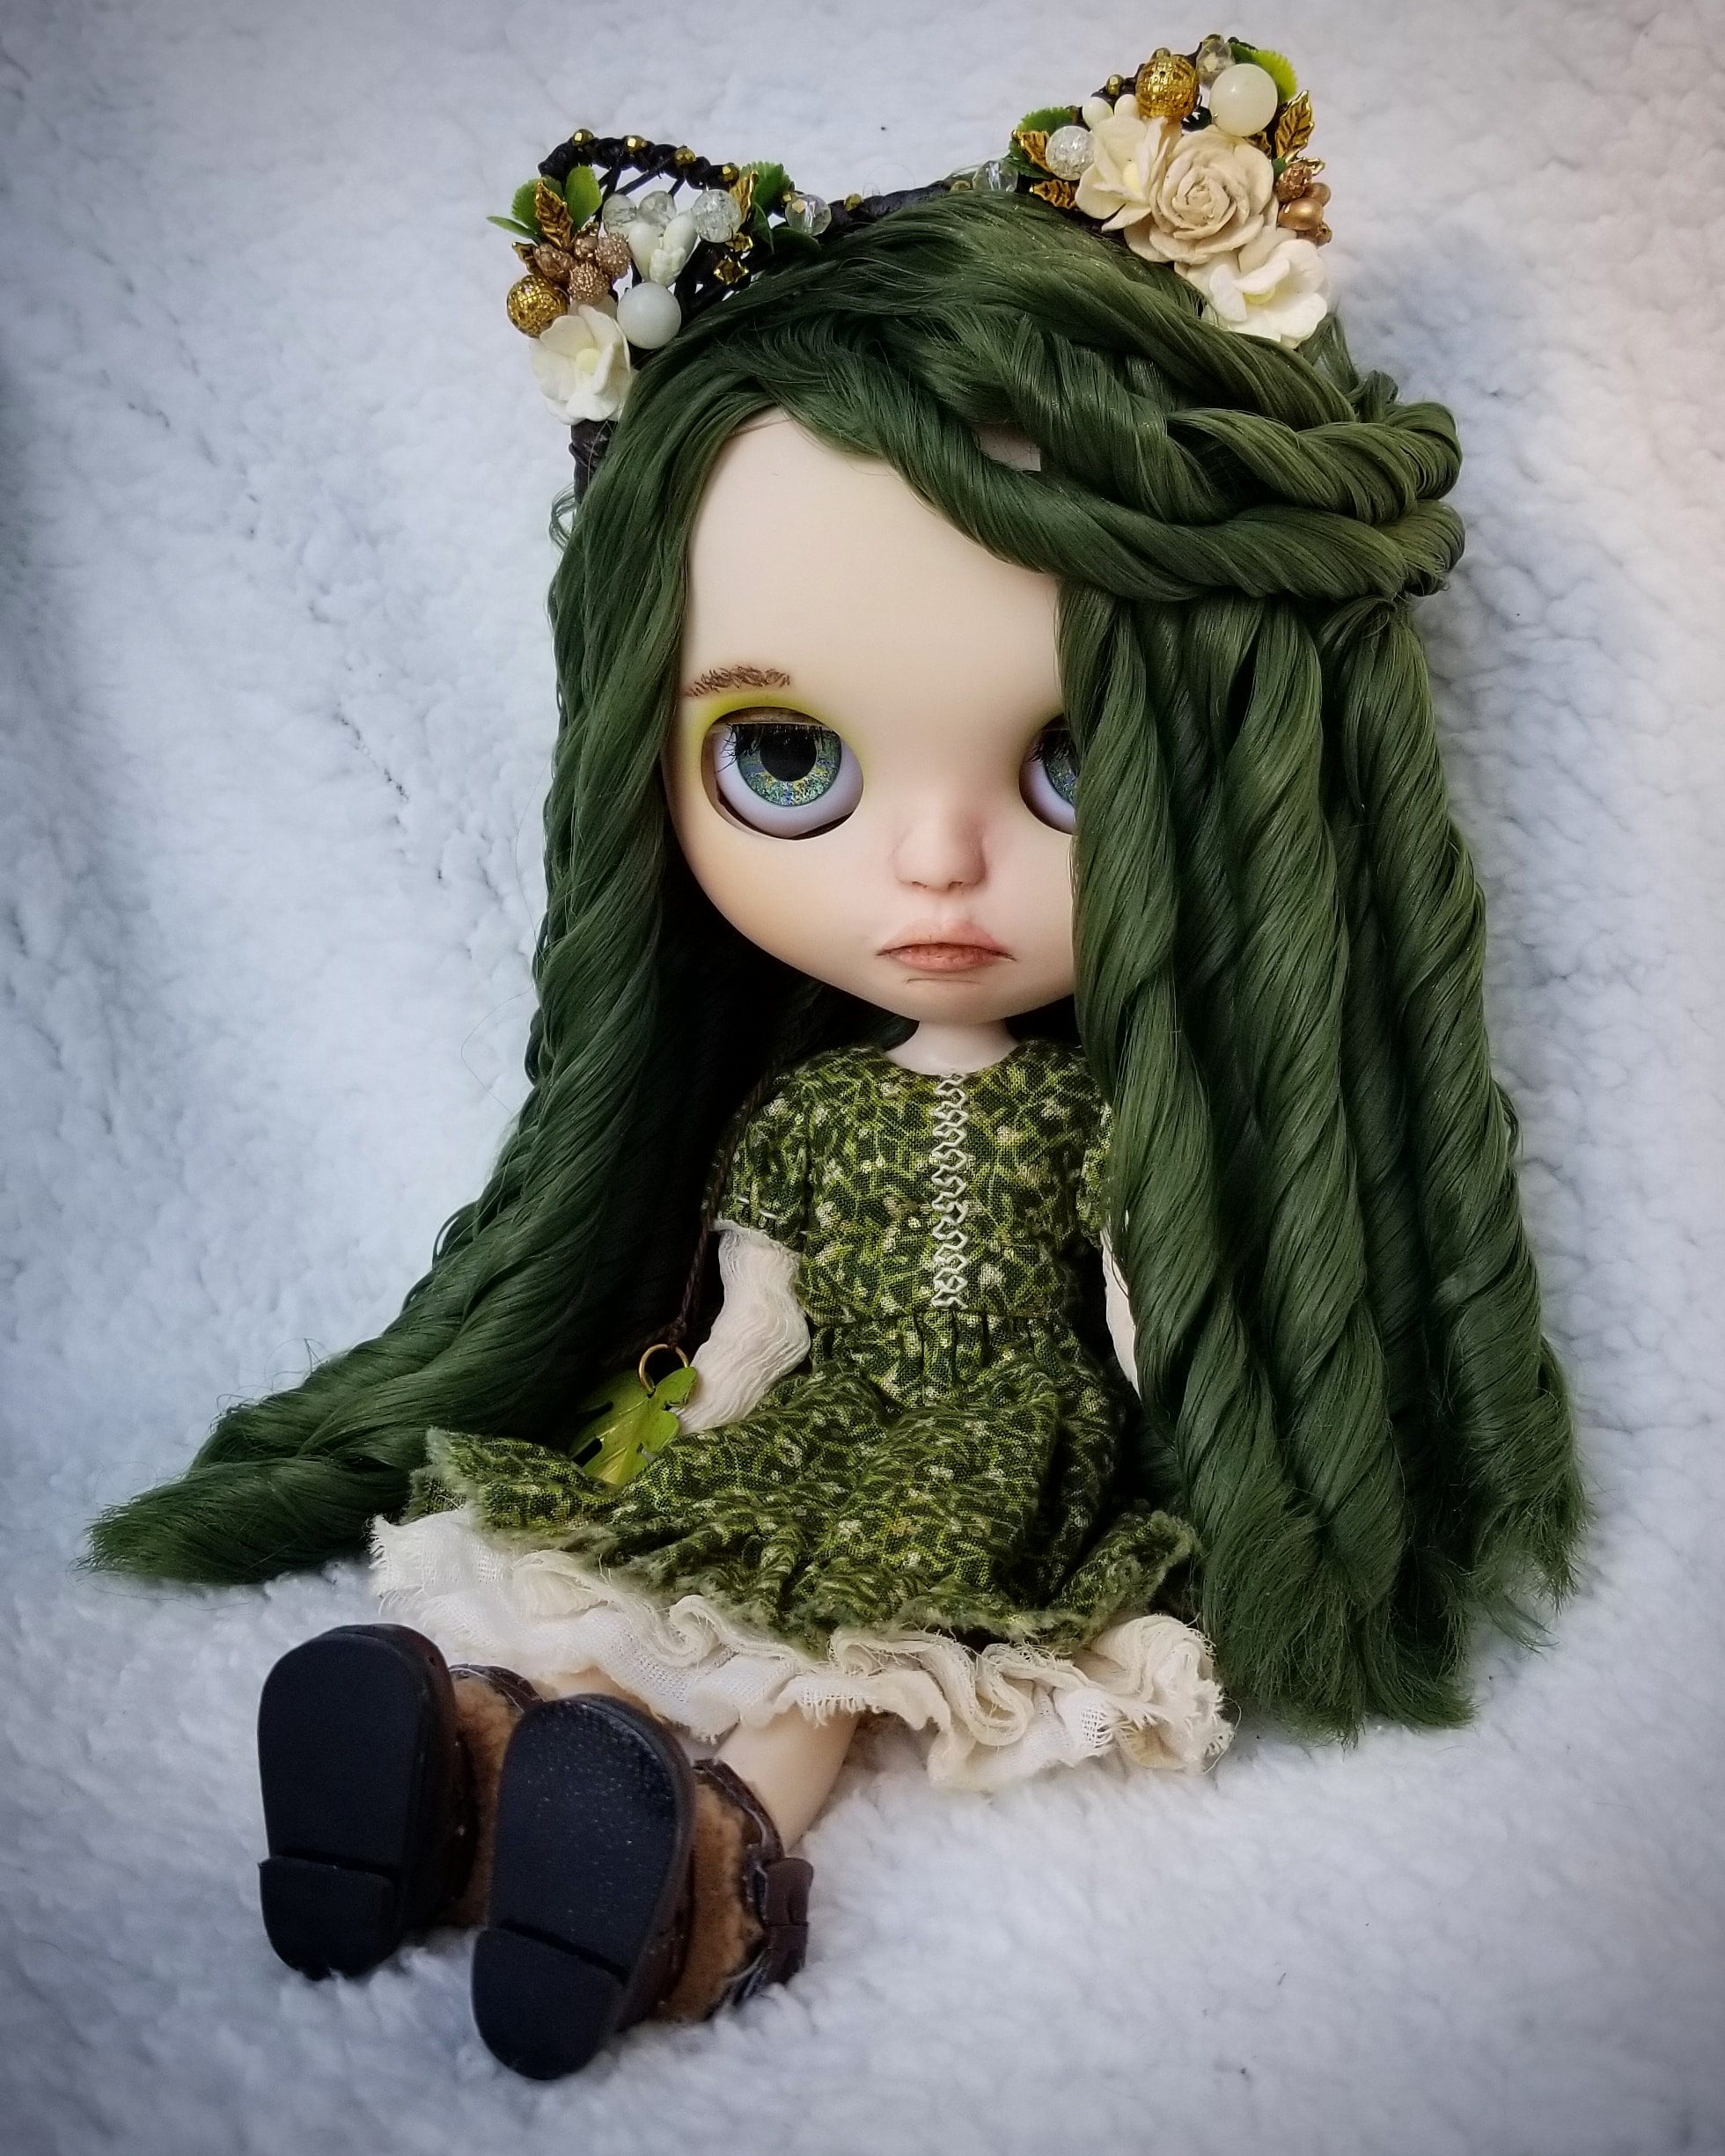
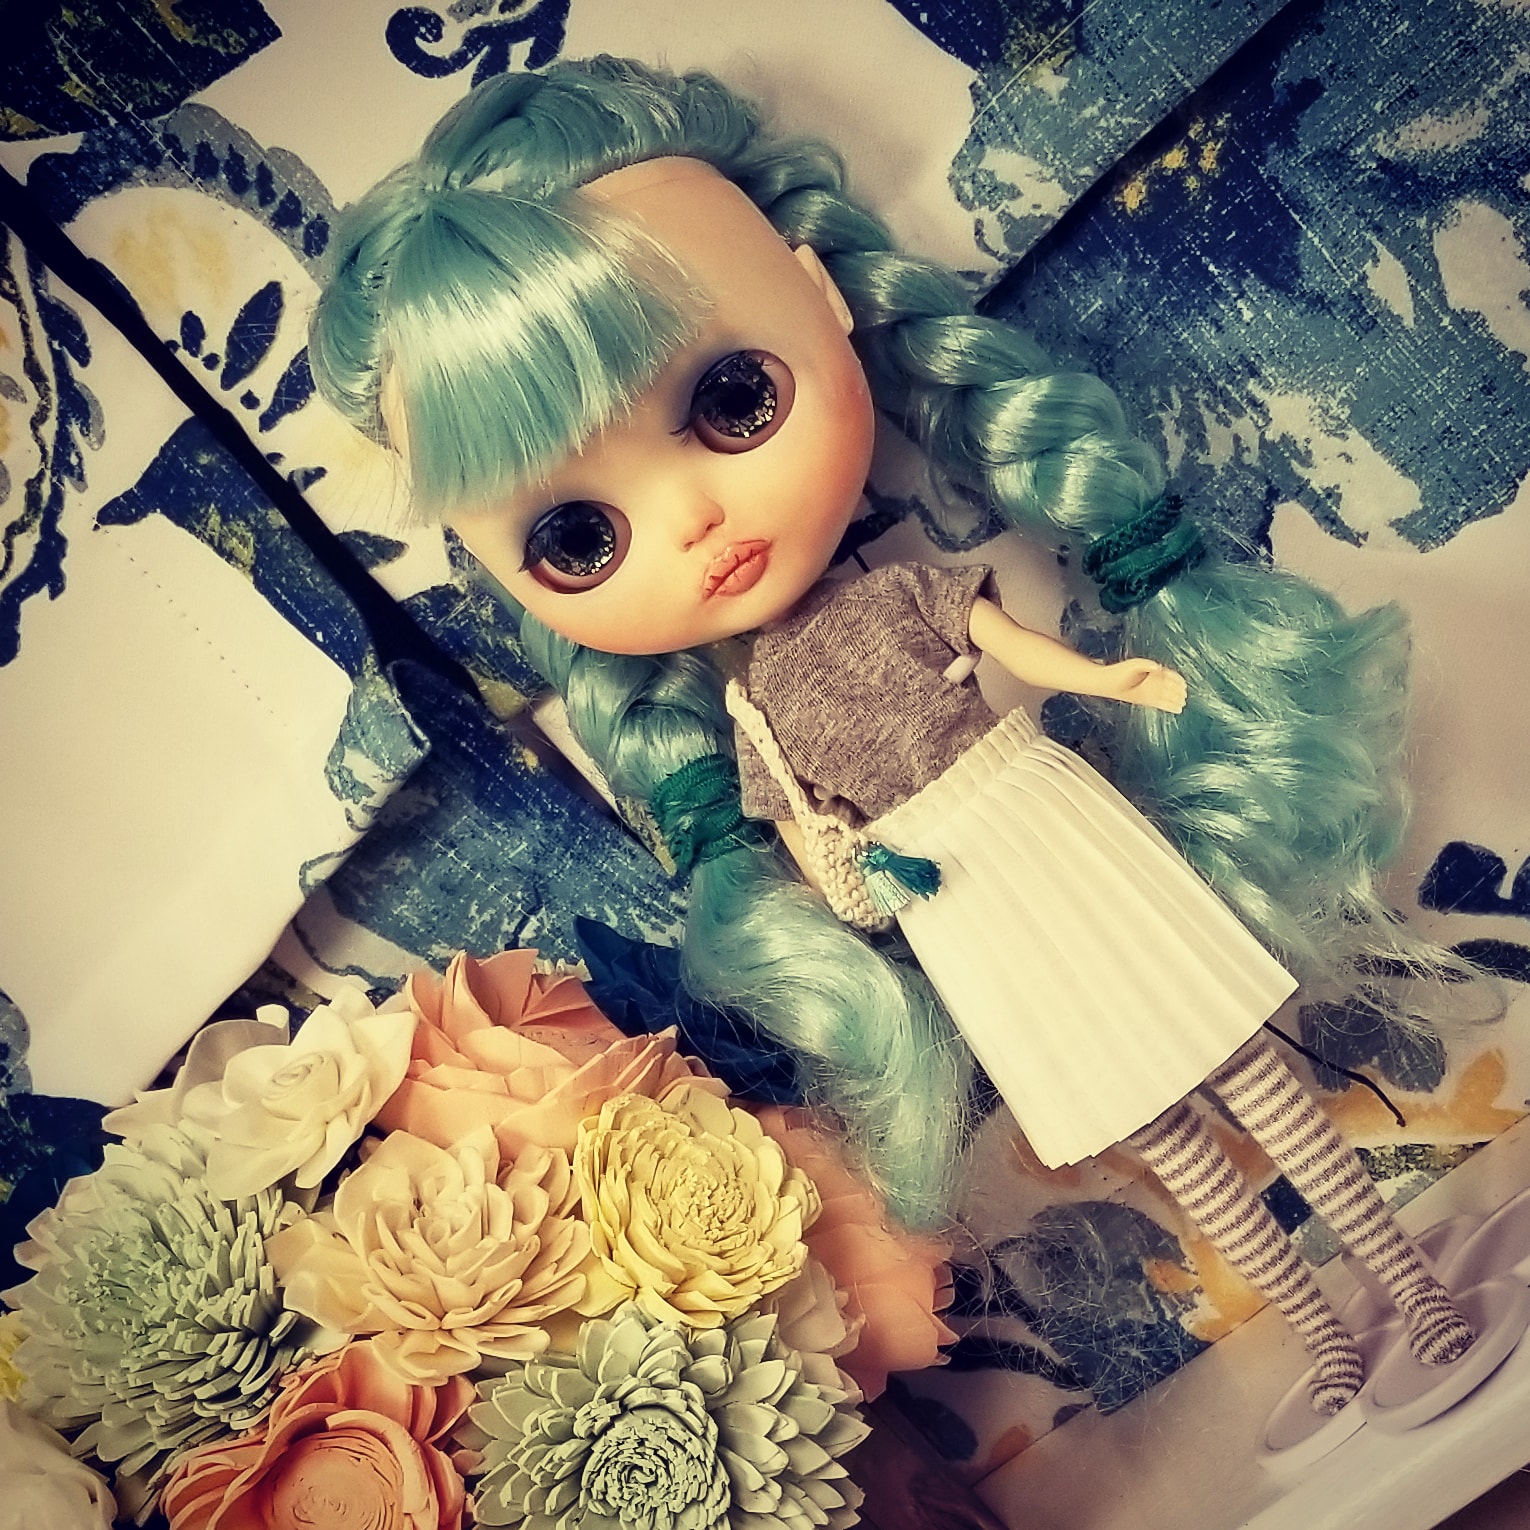
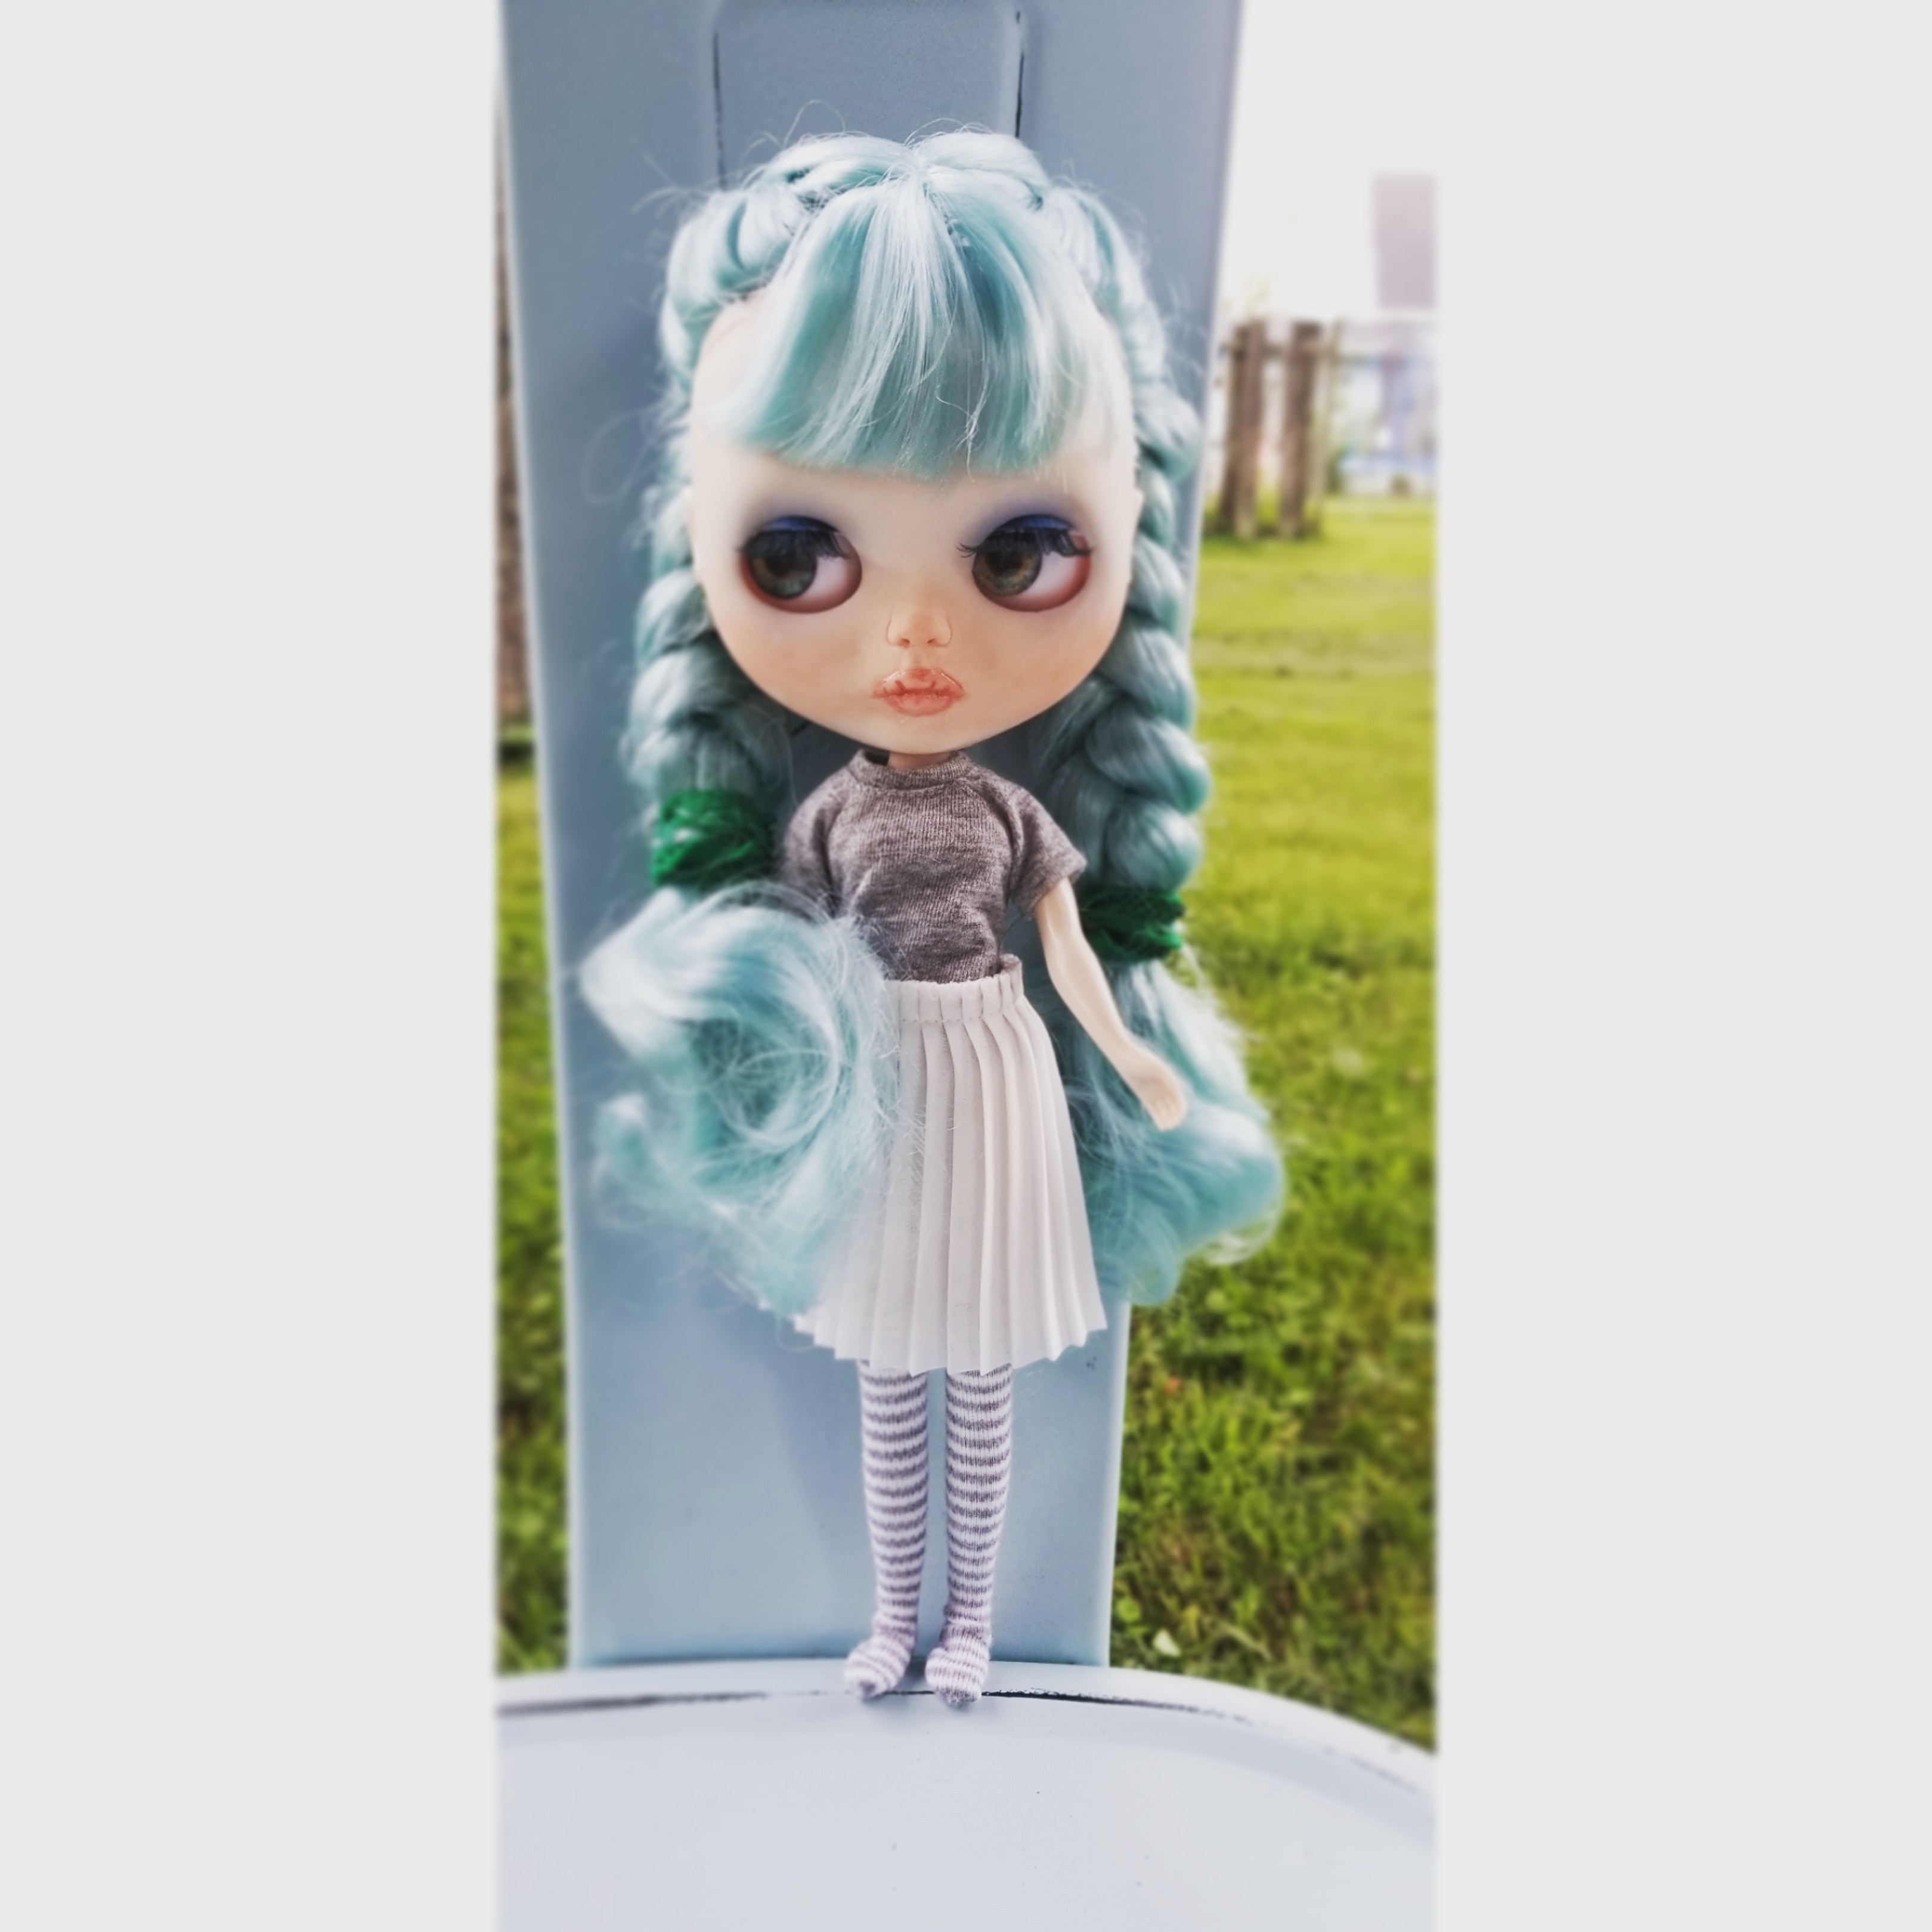
All in all, I am happy with Olive. Here are some photos from her photoshoot! I only used filters on a couple of them, and it’s obvious which ones. Otherwise here she is in all her true glory. Enjoy!
I gave her a gaze correction.Olive also now has Sleepy Eye. I love her new eyelashes too!Here she is showing off her new pull tabs.
I had to keep repeating the mantra in my head: “She’s just a practice doll, She’s just a practice doll…”. Okay, so Limona didn’t turn out EXACTLY how I wanted. But, I still love her of course!
Limona is a Basaak doll, so just like Story’s Amber, everything was a little bit of a struggle.
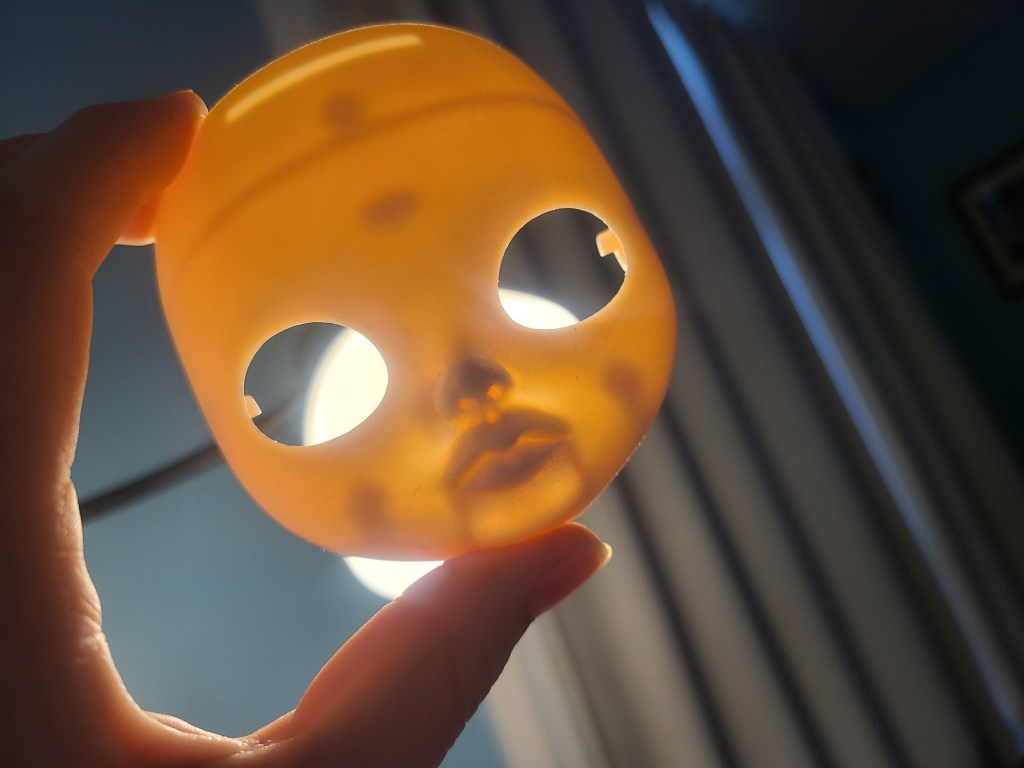
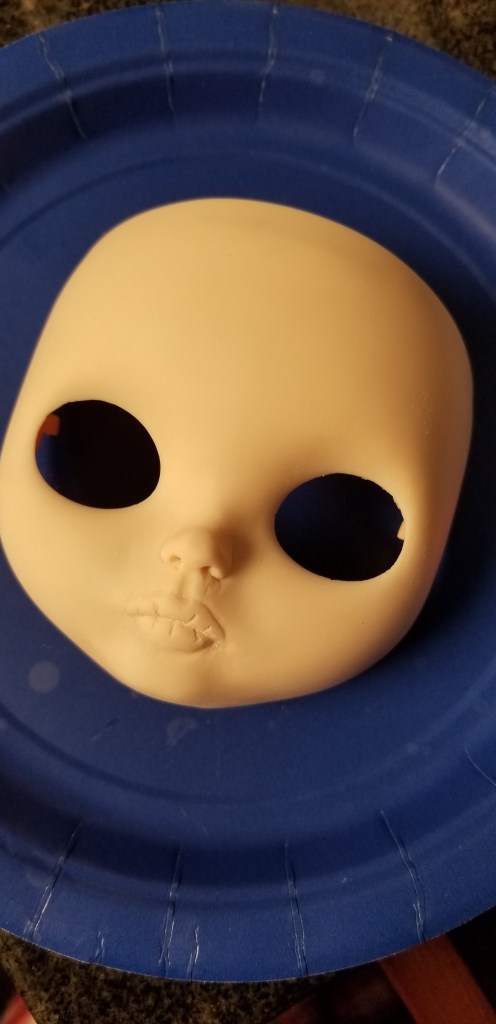
Right off the bat, with the slip of a wrist, I put the Dremel bit right through the plastic when trying to create a nostril. Just like that, there was a big hole in her face. I did my best to try and make a second hole that matched. The results… Not too pleasing. But, it is what it is! She survived.
The tools I used were so rough on her plastic. Scratches galore. Everything is uneven. Ugh…. She’s just a practice doll, she’s just a practice doll.
After working on her though, I did order some new carving and sanding tools for my next girl. Hopefully that will help in the learning process.
I also managed to mess up some eye chips. I tried reusing one set from another doll, and completely ruined them. Then for one set, as Story did with Amber, I colored and punched out a piece from a coloring book. They looked really cute at first, but as I explained in Amber’s blog post, the glue pulled the color out of them. Then they looked horrible! 😂. I do like her “fantasy eye chips” that I hand painted for her.
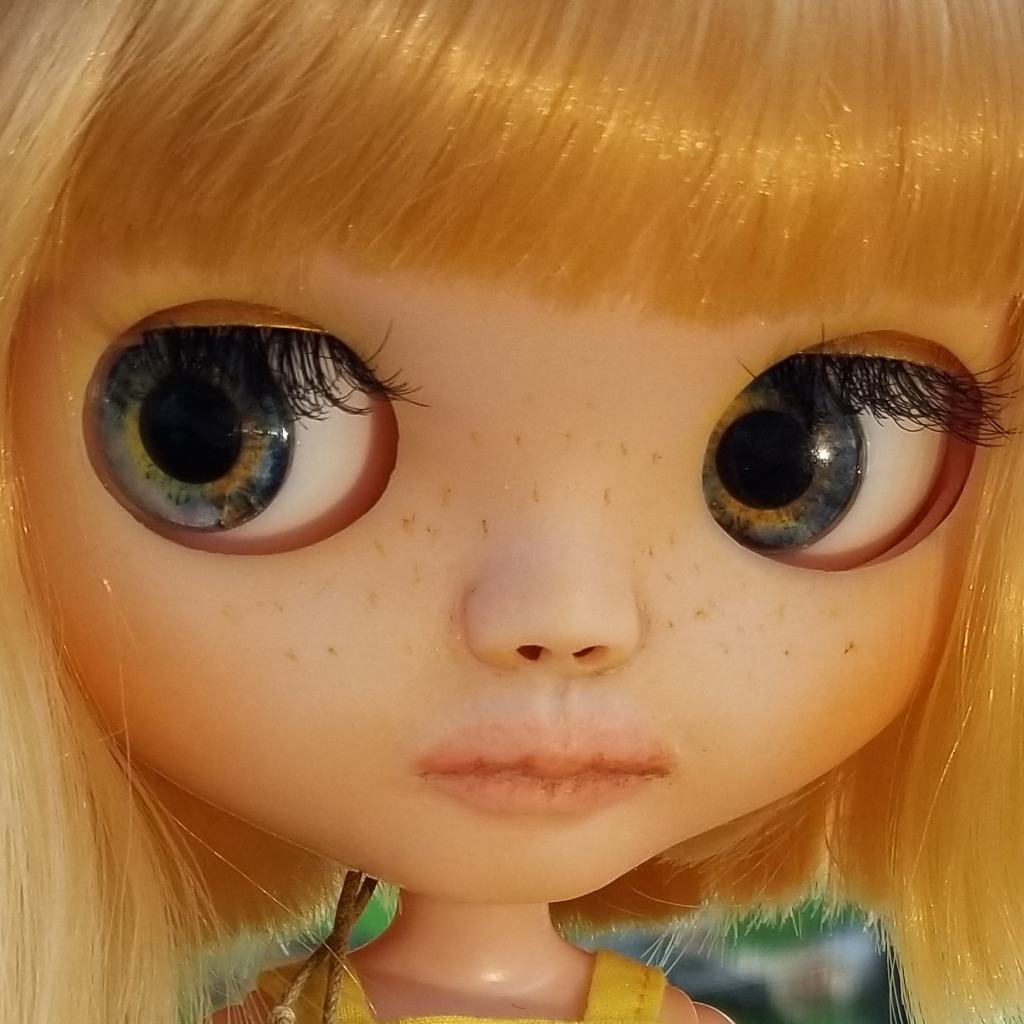
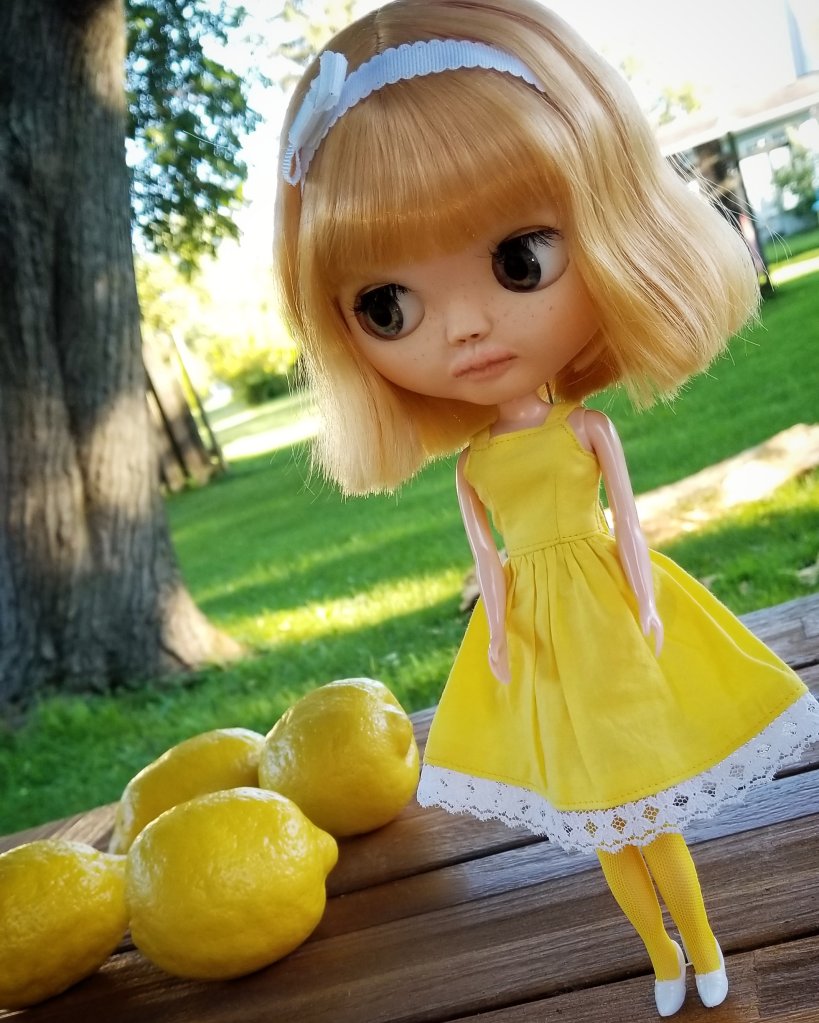
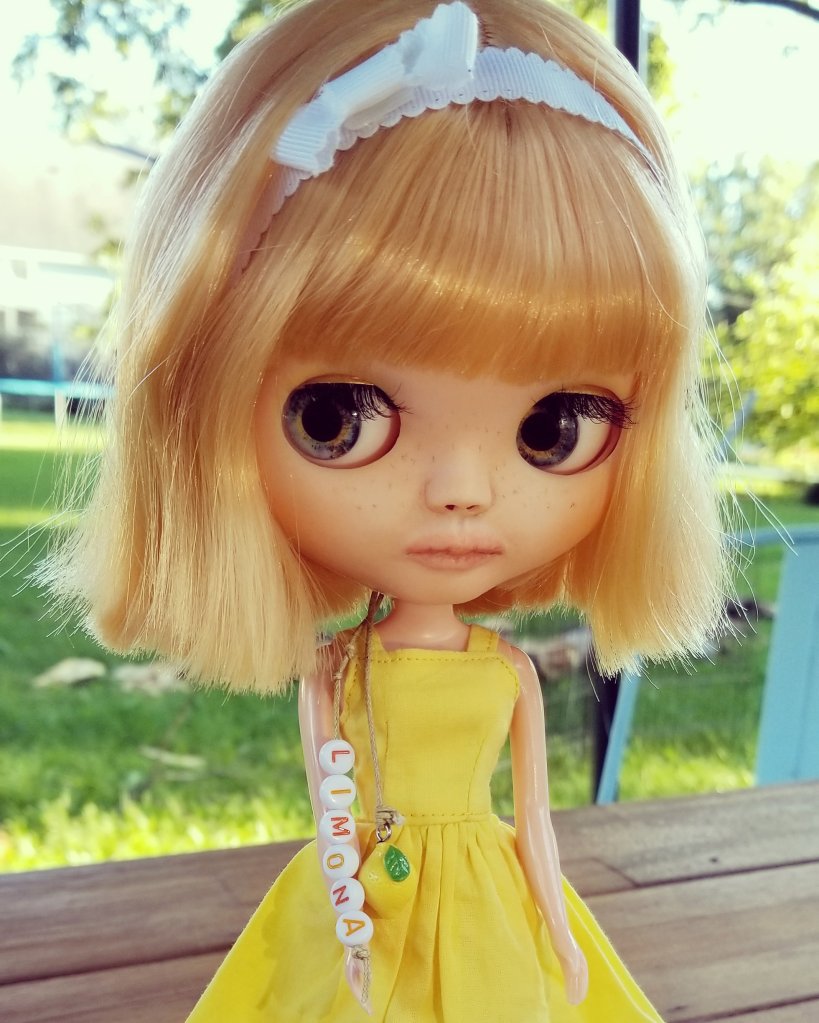
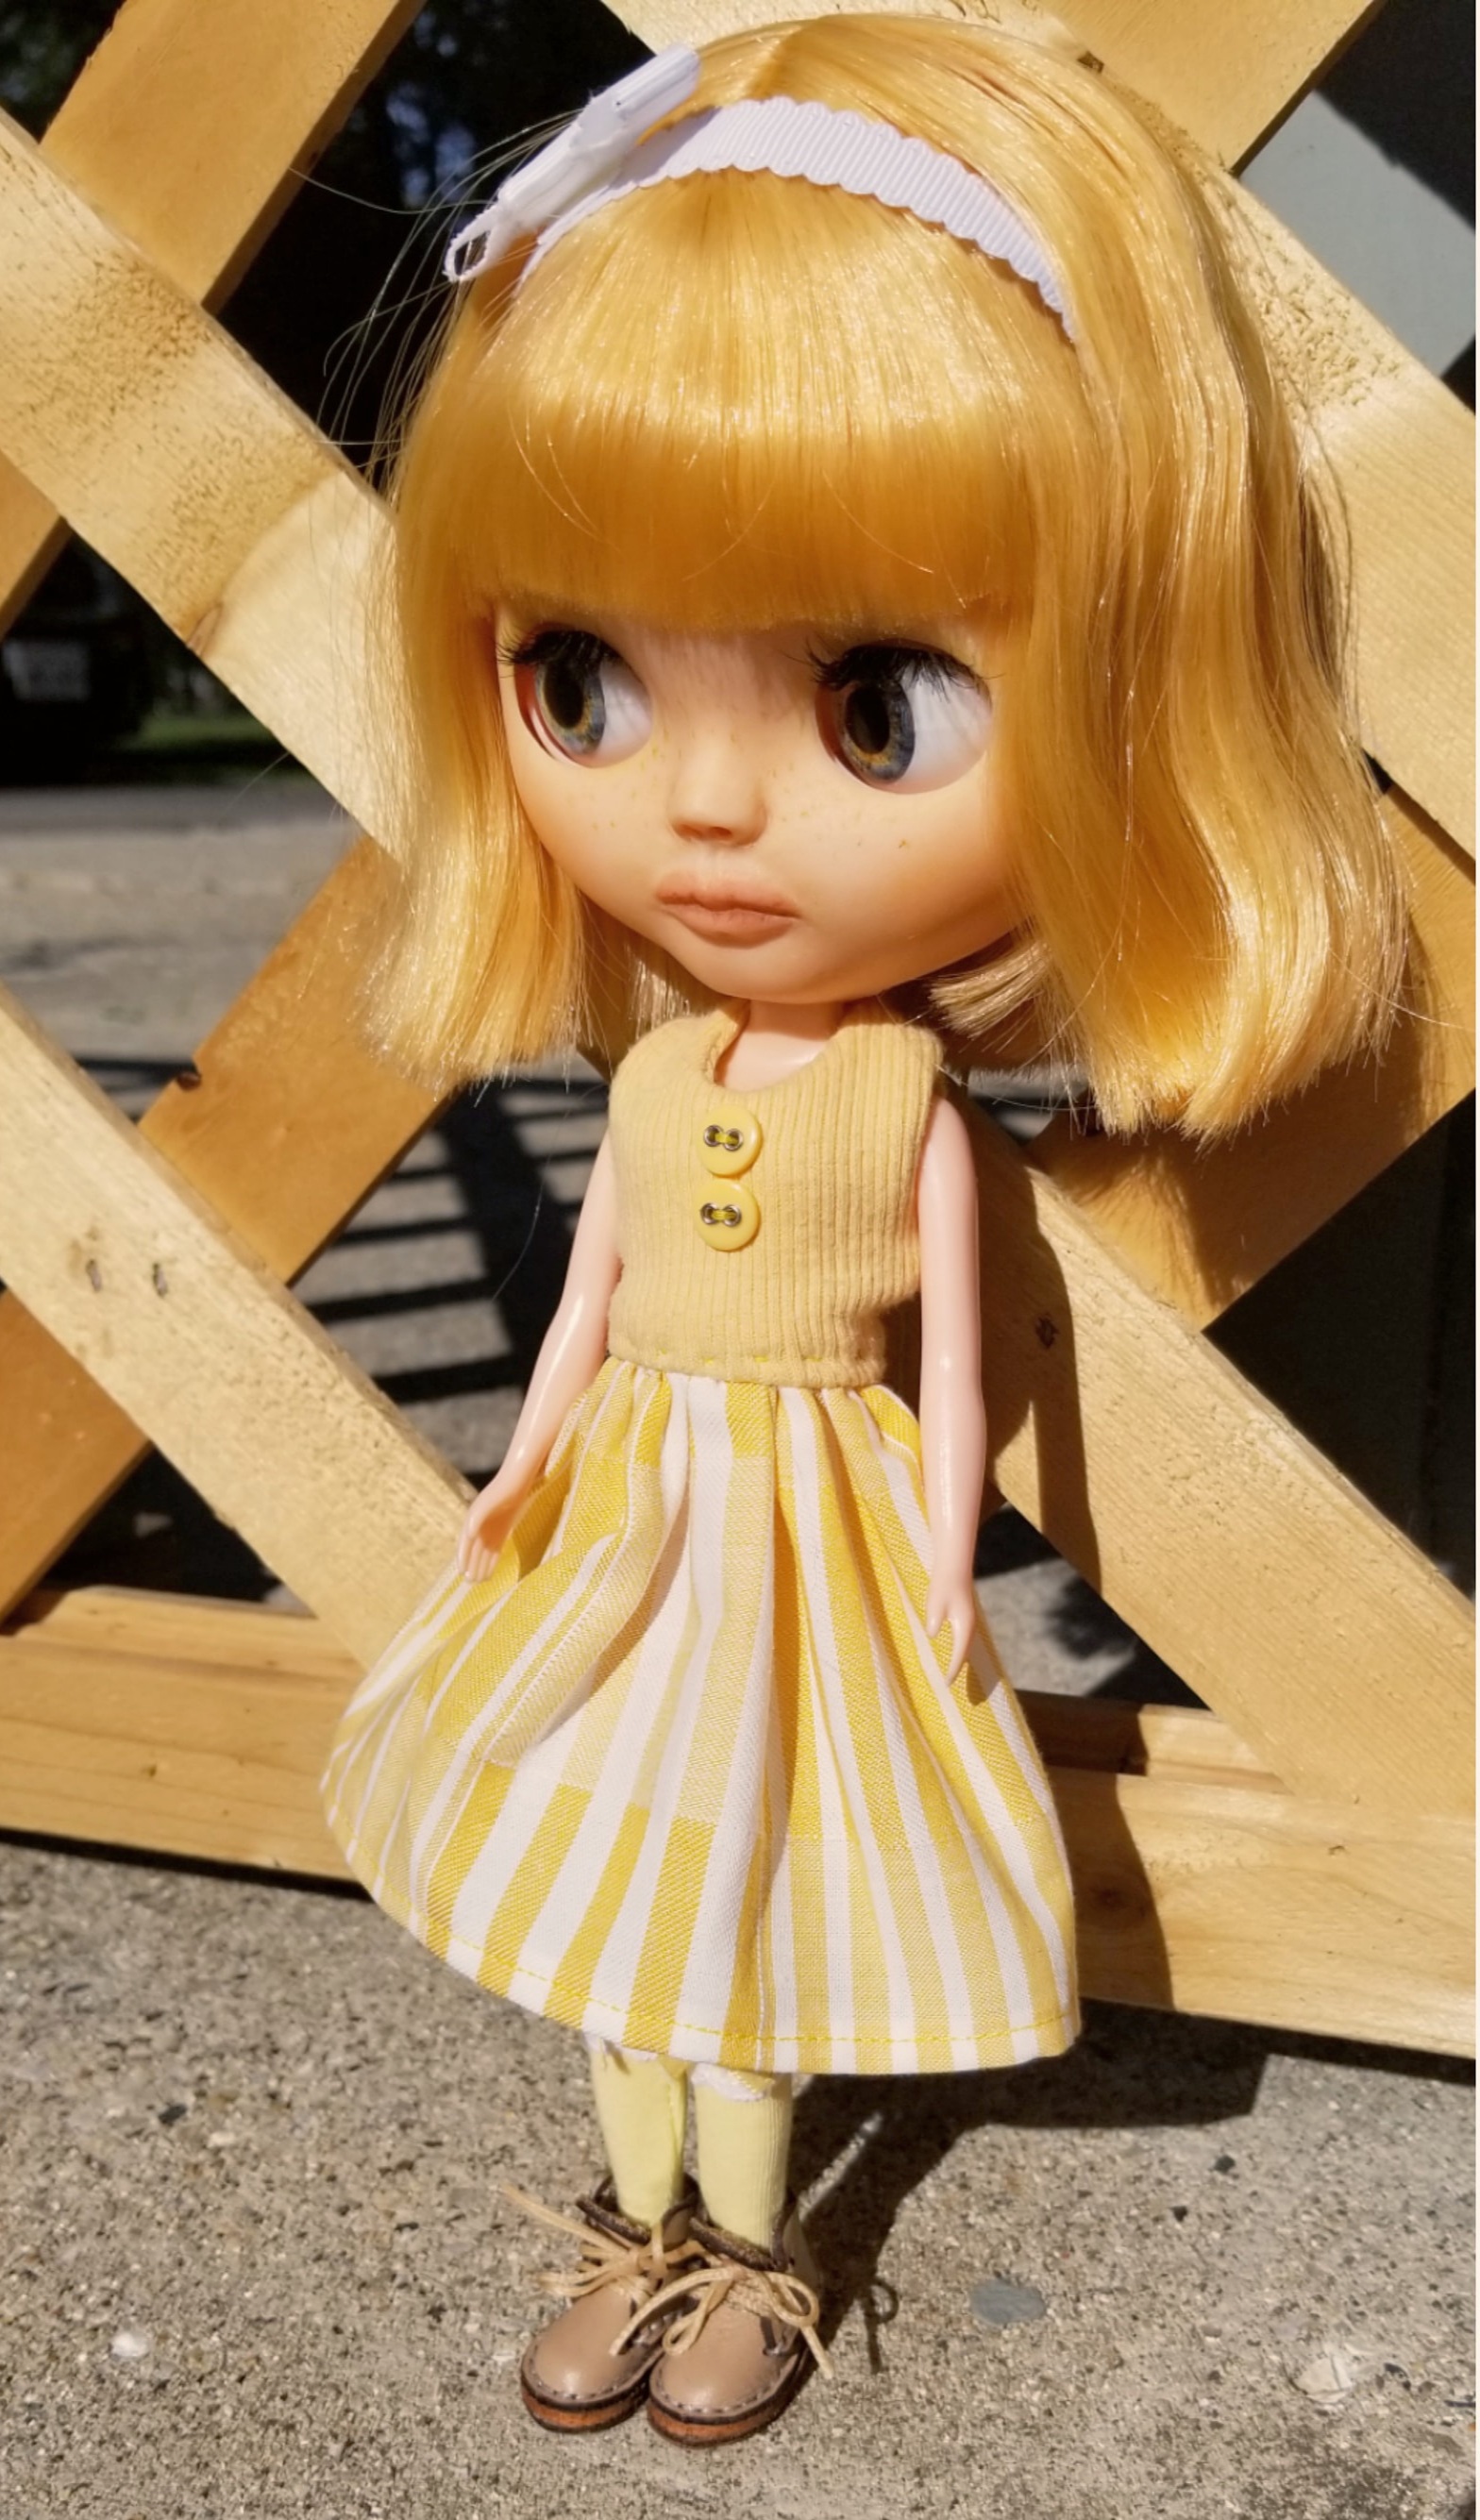
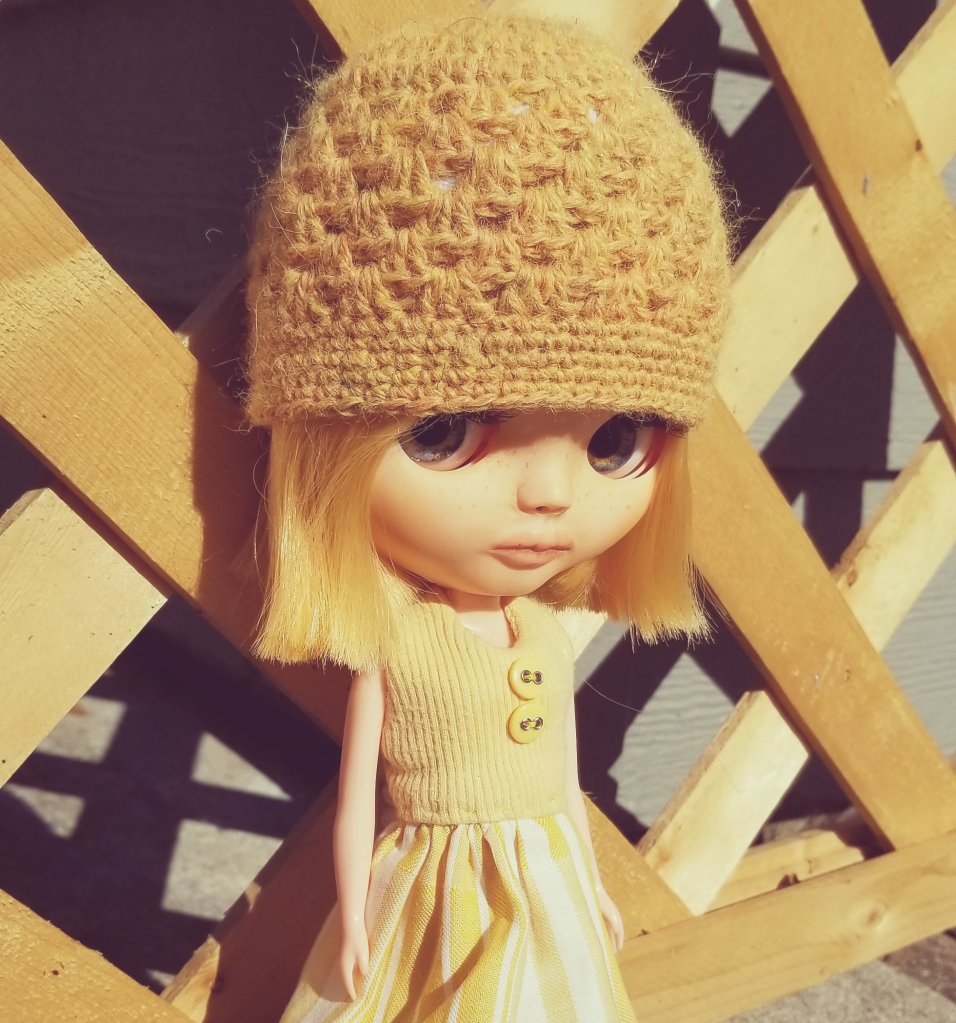
Little explanation first: Her name “Limona” is Slovenian for “Lemon”. She is my citrus girl with orange and yellow hues and NO… I’m not saying she is a “Lemon” because she is defective. Lol.
But my absolute favorite eyes of hers are a pair that I printed and glued to the chips. So vibrant! I also LOVE her full and lush eyelashes that I gave her.
The only reason I gave her freckles was to try and cover some of her imperfections, but they turned out cute. I used pastels to change her skin tone a little and add some slight makeup. A watercolor pencil for the freckles and some defining lines around the nose and inside the lips. And pastels on her eyelids, with a little heart made using acrylic paint.
All in all, I’m happy with my little practice girl. 🙂
Showing off her new pull strings.
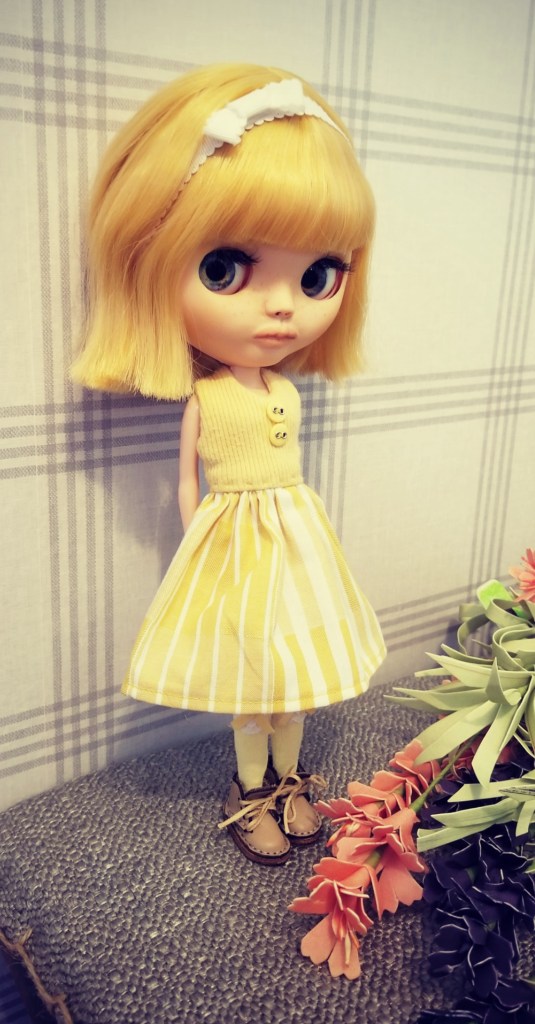
She is captured below wearing a dress and hat that my mom made!
If nothing else, she was a great practice doll, my little Lemon.
I just finished posting photos of Story’s first solo Blythe customization, Amber. Now…I want to tell you about Emily. When we worked on Amber and Limona, our practice dolls, we spent a couple weeks doing it. Well, my mom wanted to try to work on a doll so she came over one day with the expectation that we would be working start to finish. That’s a big bite to chew, but we all commited to sitting and working as hard as we could just see if it was achievable for her sake. This took 14 hours. (O.M.G.) I worked on Olive, and personally this is not the way that I ever want to do it again. It’ll be a little bit before I share pictures of olive because I’ve decided to try to tweak her a little more as I just wasn’t happy with the result. Story on the other hand worked on Emily and absolutely blew my mind with how good she did.
Emily is a factory doll that was not made up of Blythe parts. So she is a fake, but she was a much better quality than our Basaaks.
For Emily, Story used the Dremel tool briefly, but for the most part she used hand-held carving tools.
Story decided to not give her sleepy eye, nor to do a gaze correction. I’m not sure yet if that’s going to be a preference for her or if she just felt in a hurry with this doll. She did however give her some new lashes. Emily’s eye chips came out so easy compared to Amber’s! One of her new pairs is a printed pair, but my favorite are these chips that Story painted on her own.
She struggled a little again with the chalk pastels. Unfortunately, she had some chalk on her hands that she didn’t know about, so when she was holding the faceplate it came off onto the plastic without her realizing it. So, some of the chalking was a little spotty. She is her worst critic though because I do not feel it looks near as bad as she feels it looks.
I think she did an absolutely beautiful job on Emily…I am so impressed! Her response to me is “Mom, I could have done a lot better.” She is so my daughter.
She is also wearing a skirt that Story made, and sporting a handbag that her Grandma Micky crocheted for her.
And of course, she did a beautiful job painting her eyelids. She is such an artist (proud momma moment).
Story has absolutely blown my mind with how fast she is learning! We each got a Basaak doll, which are pretty cheap (in price and quality) Blythe doll knock offs.
We thought it was a good idea to work on those as practice dolls, just to get a feel for how to use the tools and so forth. And man alive are we glad we did…because we sure did a number on their poor faces. 😂.
It was good practice though, and we had a lot of fun. I worked on Limona (I’ll share pictures later this week) and Story worked on Amber. She had some issues with being patient and working slow, but she got used to using the Dremel, carving and sanding tools.
Both the girls had hair that was not very soft, so we did a wash in Fabric Softener before we gave them cuts.
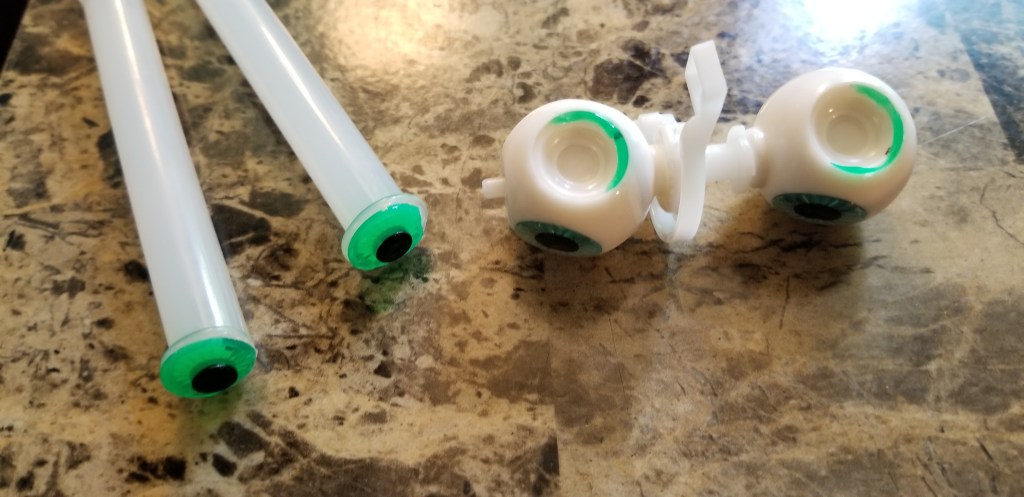
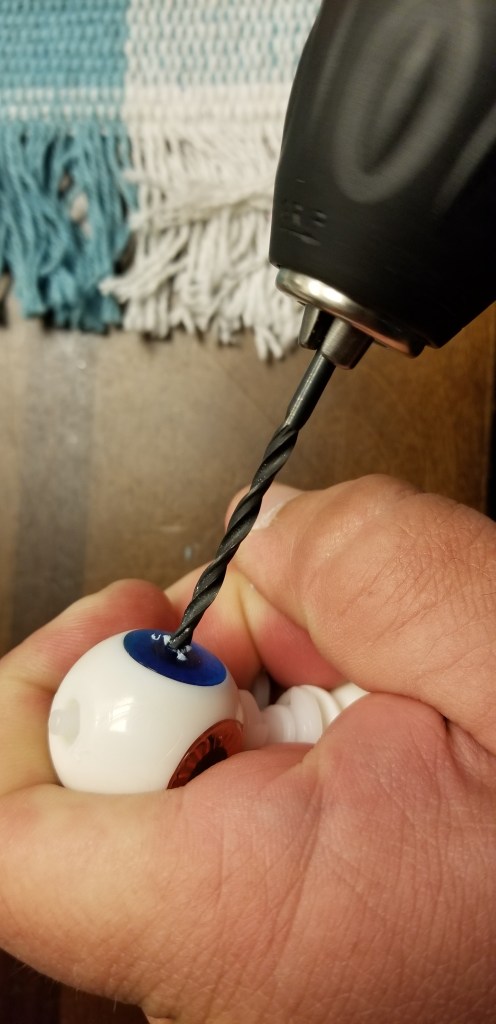
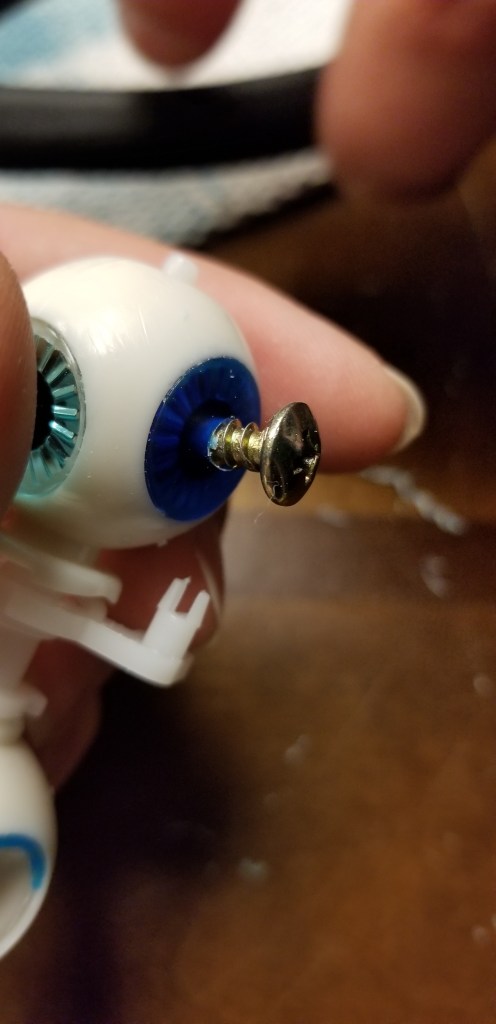
Because we were working with the fakest of the fakes, everything was…well…a struggle. They must have used the strongest glue known to mankind for the eye chips. They were all very difficult to remove. Some of them popped partially out with multiple glue stick operations, but Amber’s eventually had to be removed surgically with a drill and screw. What a hassle!
We did some experimental work for the eye chips, none of which really turned out too well. The ones you will see in the photos below were made with an image from a coloring book that we punched out. She actually did a great job on them, they were vibrant and beautiful. But then the glue we used to attach them pulled the color out of them and left them looking uneven and faded. So sad. But…we learned our lesson.
We were excited to play with our pastels, and then struggled there too. Lol. Story accidently got a reddish pink on Amber’s face, then tried to even it out, and had a lot of trouble. I’ll say it yet again… We are learning! This is not an easy craft, and there isn’t a lot of resources out there. Of the advice that is out there, most of it is NOT in English, so for a lot of this we have to just wing it and learn as we go. That being said, Story already worked on her next girl and I can’t wait to share how fast she advanced her skills!
So… This is Amber! Not bad for a kid’s first attempt!
I love the painting job she did on Amber’s eyelids! She gave her “sleepy eye” so we could enjoy them fully. She also gave her some lashes that we’re much fuller than her original lashes.
Thanks for looking… Immediately after this I will be sharing photos of her second customization doll!
Before I even started working on Trixie, I ordered Olive to add to our family. Olive is a factory Blythe doll. This means she is not a Stock doll (comes with a name, outfit, and in a box), but she is also not a fake (clone). She is pieced together with real original doll parts. There are advantages to buying a factory doll: they are real (which makes a huge difference in quality), they have soft and often colorful hair, and their price tag is smaller than a stock doll. Her head is stamped 2006 and her body is a 2002. I fell in love with her green hair instantly. She and Trixie became fast friends.
I have not yet done any work on Olive, and don’t plan to until after I get more practice on a recently acquired Basaak (fake) doll. Story also has a Basaak we will be starting to work on (hopefully today if my back pain allows it!). After our Basaaks are complete, I will be creating Olive and she will be creating Kaiya! I can barely contain my excitement! She has also been playing around with making some clothes for us. It will be nice when we no longer have to wait for two months to receive the little pieces we need for our girls. Shipping from other countries already takes forever, now add Covid19 delays on top of it. 😦
Here are some fun photos I took of Olive a few years back:
I was both nervous, and excited to buy my first official Blythe doll! She is the 2011 Rainbow Sorbet Neo Blythe, and she had never been removed from her box. I bought her in 2012, and I hung on to the box til this day purely for sentimental reasons. She was so gorgeous!
Story fell in love fast! They were two peas in a pod!
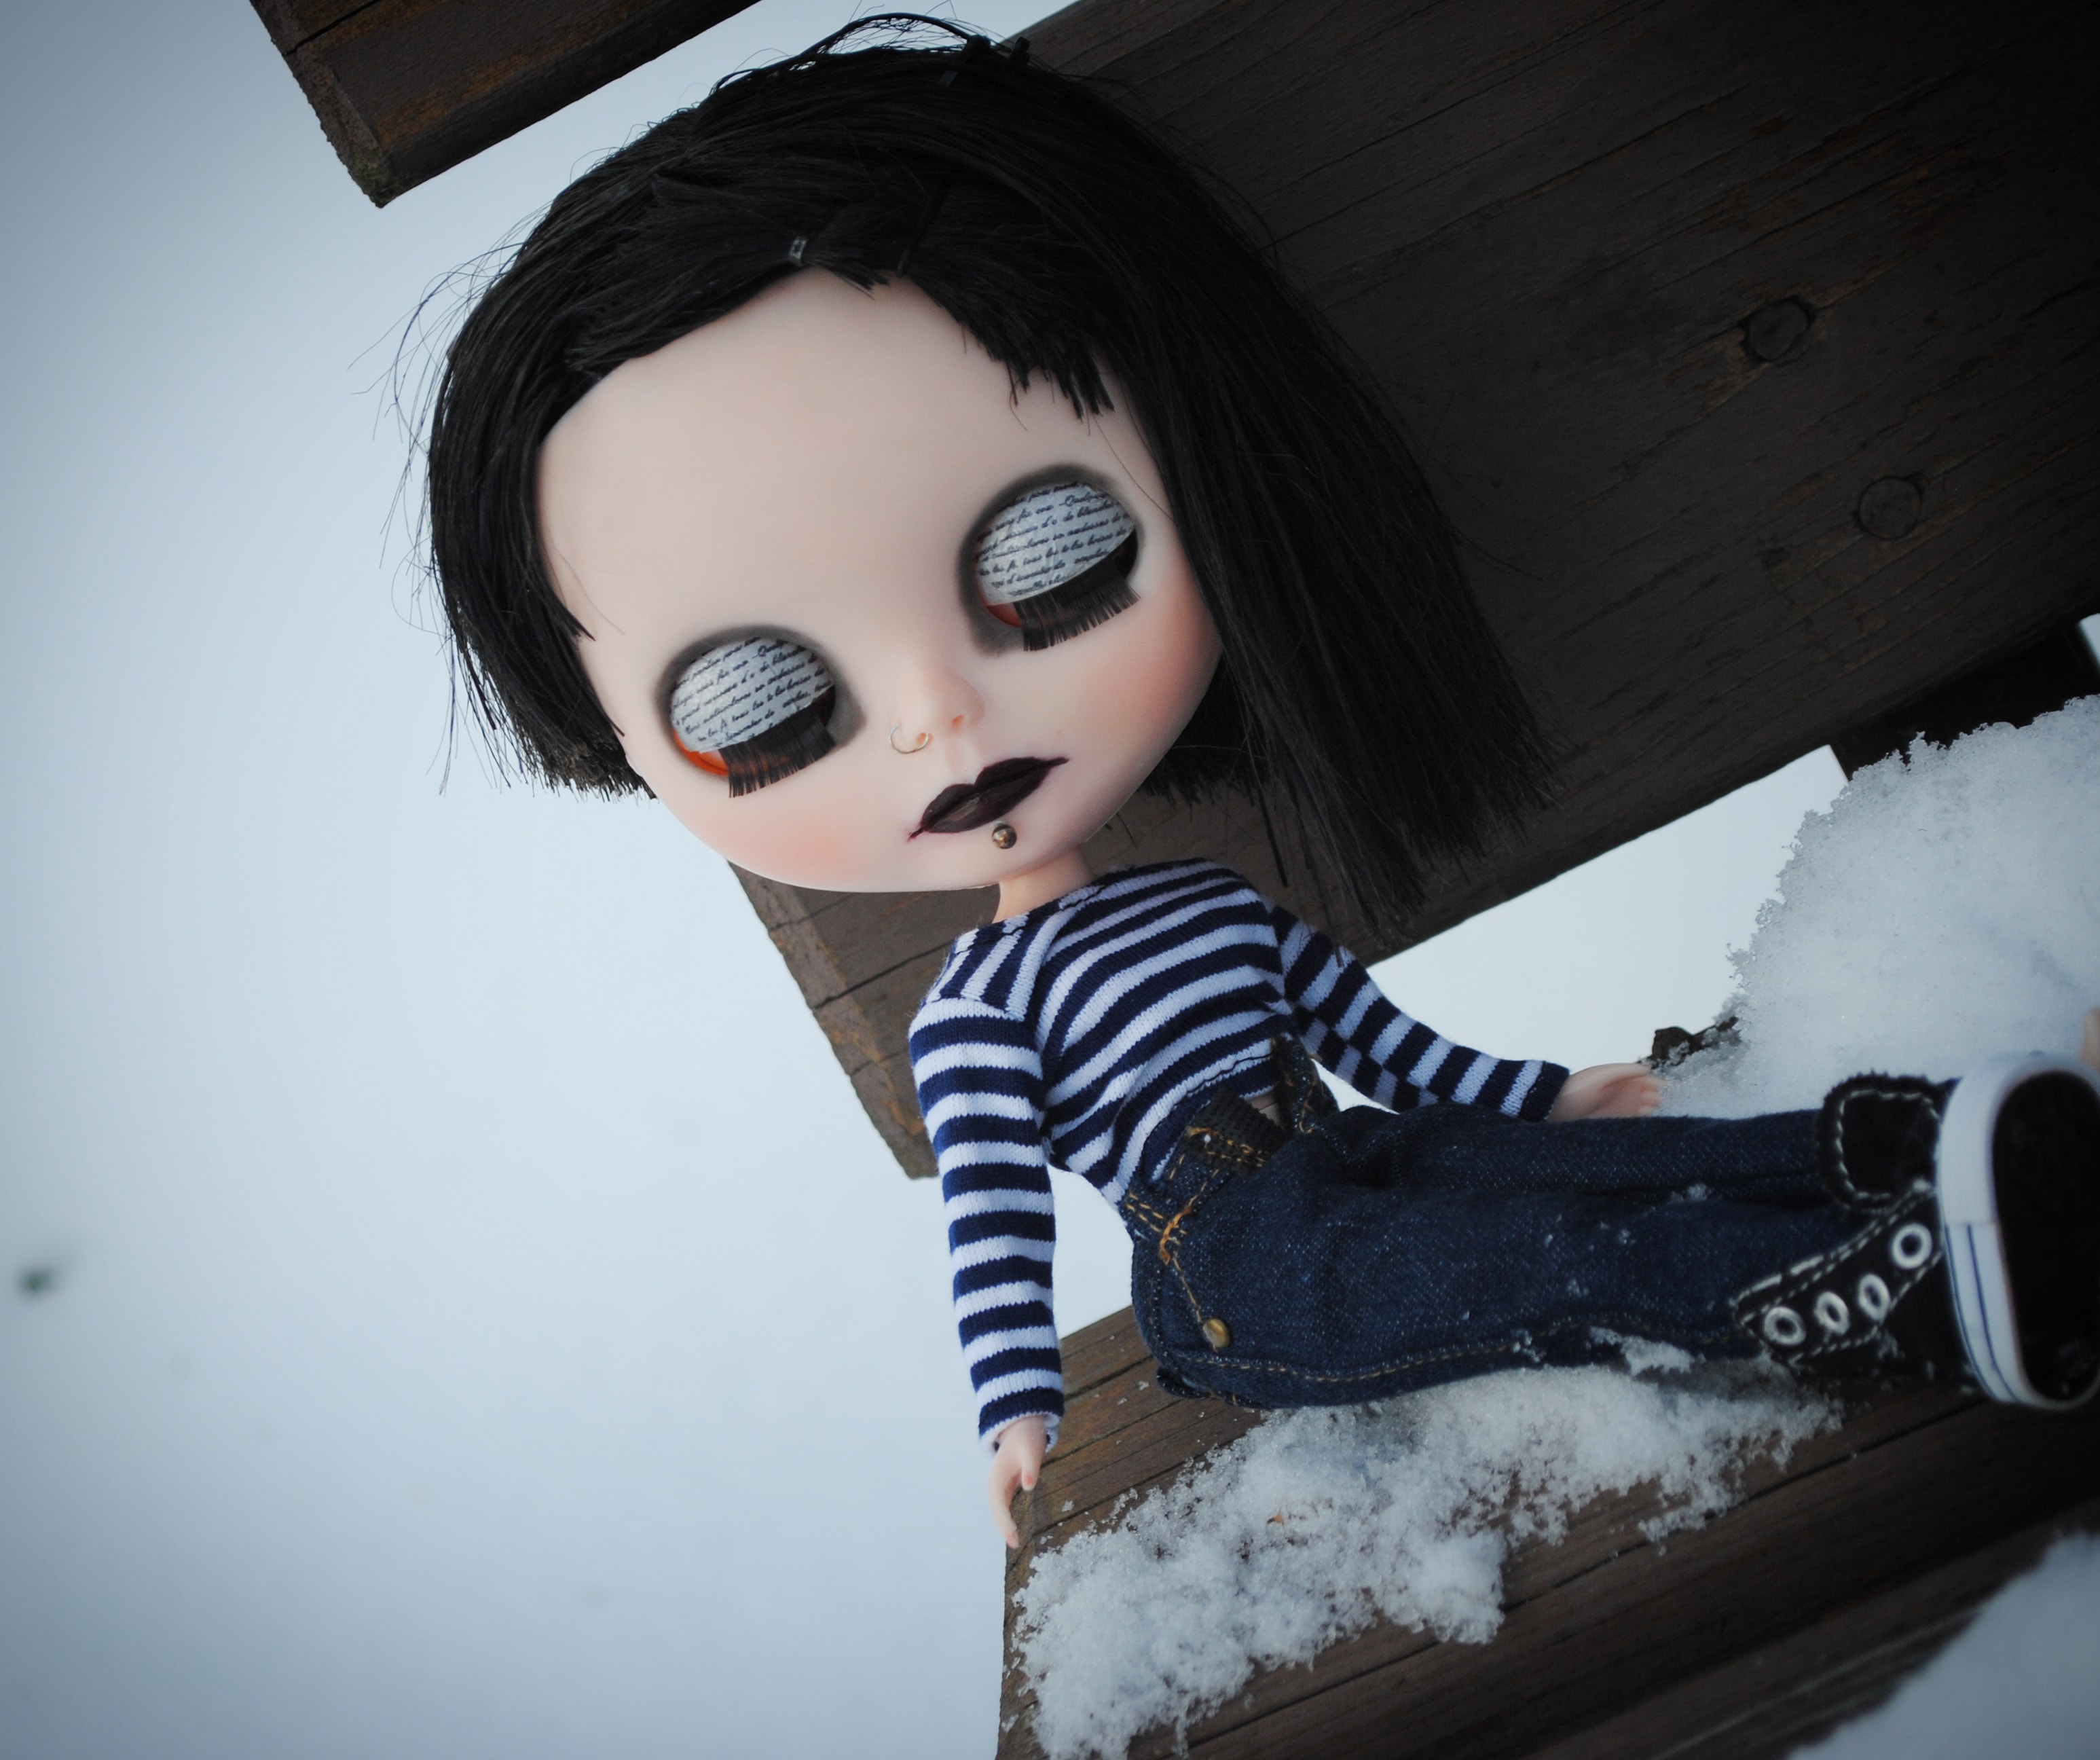
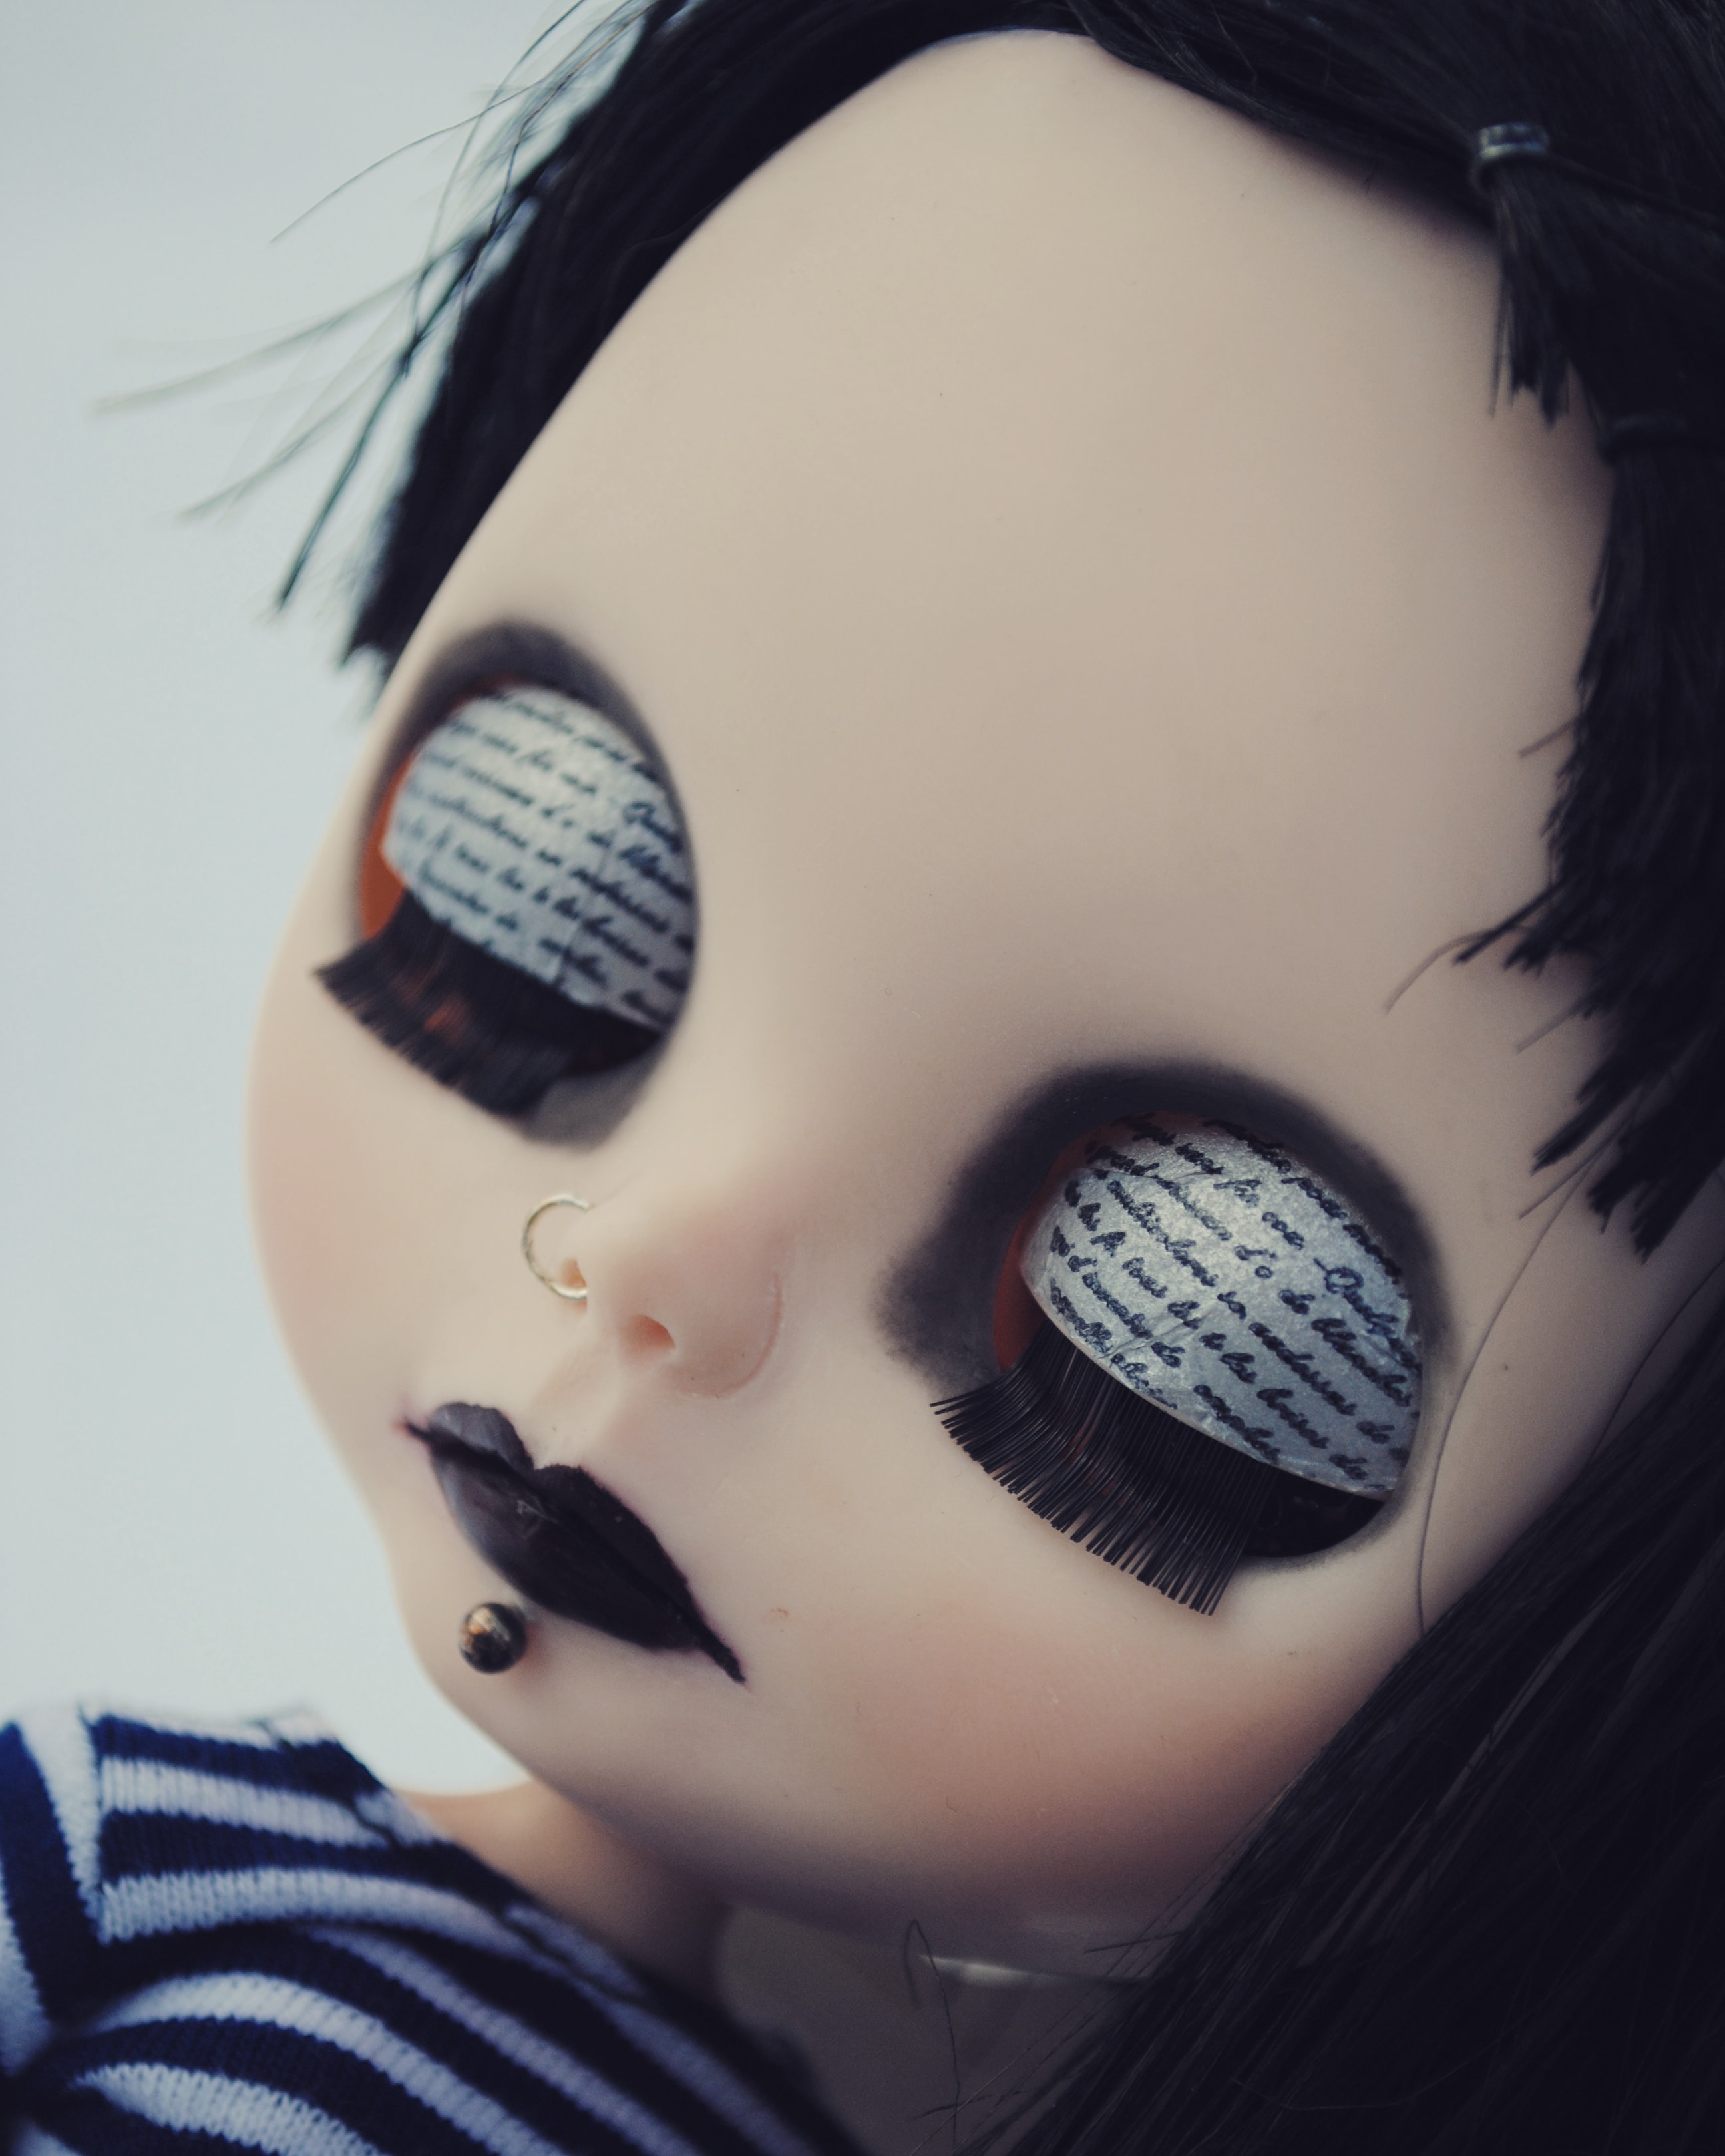
I actually shied away from working on Trixie for quite a while, and even purchased another doll beforehand. But, in 2014 I finally got to work. I still kept the carving very simple, shaping her lips, her nose, and her philtrum. I kept her original lashes, but used patterned vellum paper with modge podge to dress her eyelids up, and gave her sleepy eye.
What I was most excited for with Trixie was her piercings and her skull eye chips! To be honest, I am completely aware that I did not do a very good job on her face carvings. But I still very much love her and her unique personality. 🙂
Her hair… was a failure. I don’t quite understand what I did wrong here… I followed all the directions and used the right dye products that you tube videos told me to, but I just couldn’t pull it off. SO… I gave up and painted her hair with acrylic paint. Really though, with the cut I gave her, and with the rest of her features, her overall hair style turned out well and fits her just fine!
I love Trixie just how she is… but I may possibly go back at it to try and correct some of her sharp lines. In person you can’t see them as much as you can in the photos. but they still bother me a little. We’ll see!!! All I can do is keep learning, keep practicing, and hopefully get better!
Meet Monique! This is how she arrived, nude, and shiny, and with just the right amount of attitude. Monique is a Basaak doll. We started out with a knock off doll, mainly because of the lower price tag.
We wanted to play right away without diving too far into the carving work, so I removed her shine right off the bat. These cheap dolls don’t have the best scalps, so I simply cut off all of her hair and purchased an inexpensive wig for her.
I loved that Story wanted to work on Monique with me. She was 5 years old at the time, so she wouldn’t be able to do much with the carving tools quite yet. But, she enjoyed helping out as much as she could.
We did a little makeup, dressed her up for Halloween and took some photos.
Our Halloween photo shoot gave us a little taste… but it was time to start carving. I kept my first attempt very simple, with only a little detail.
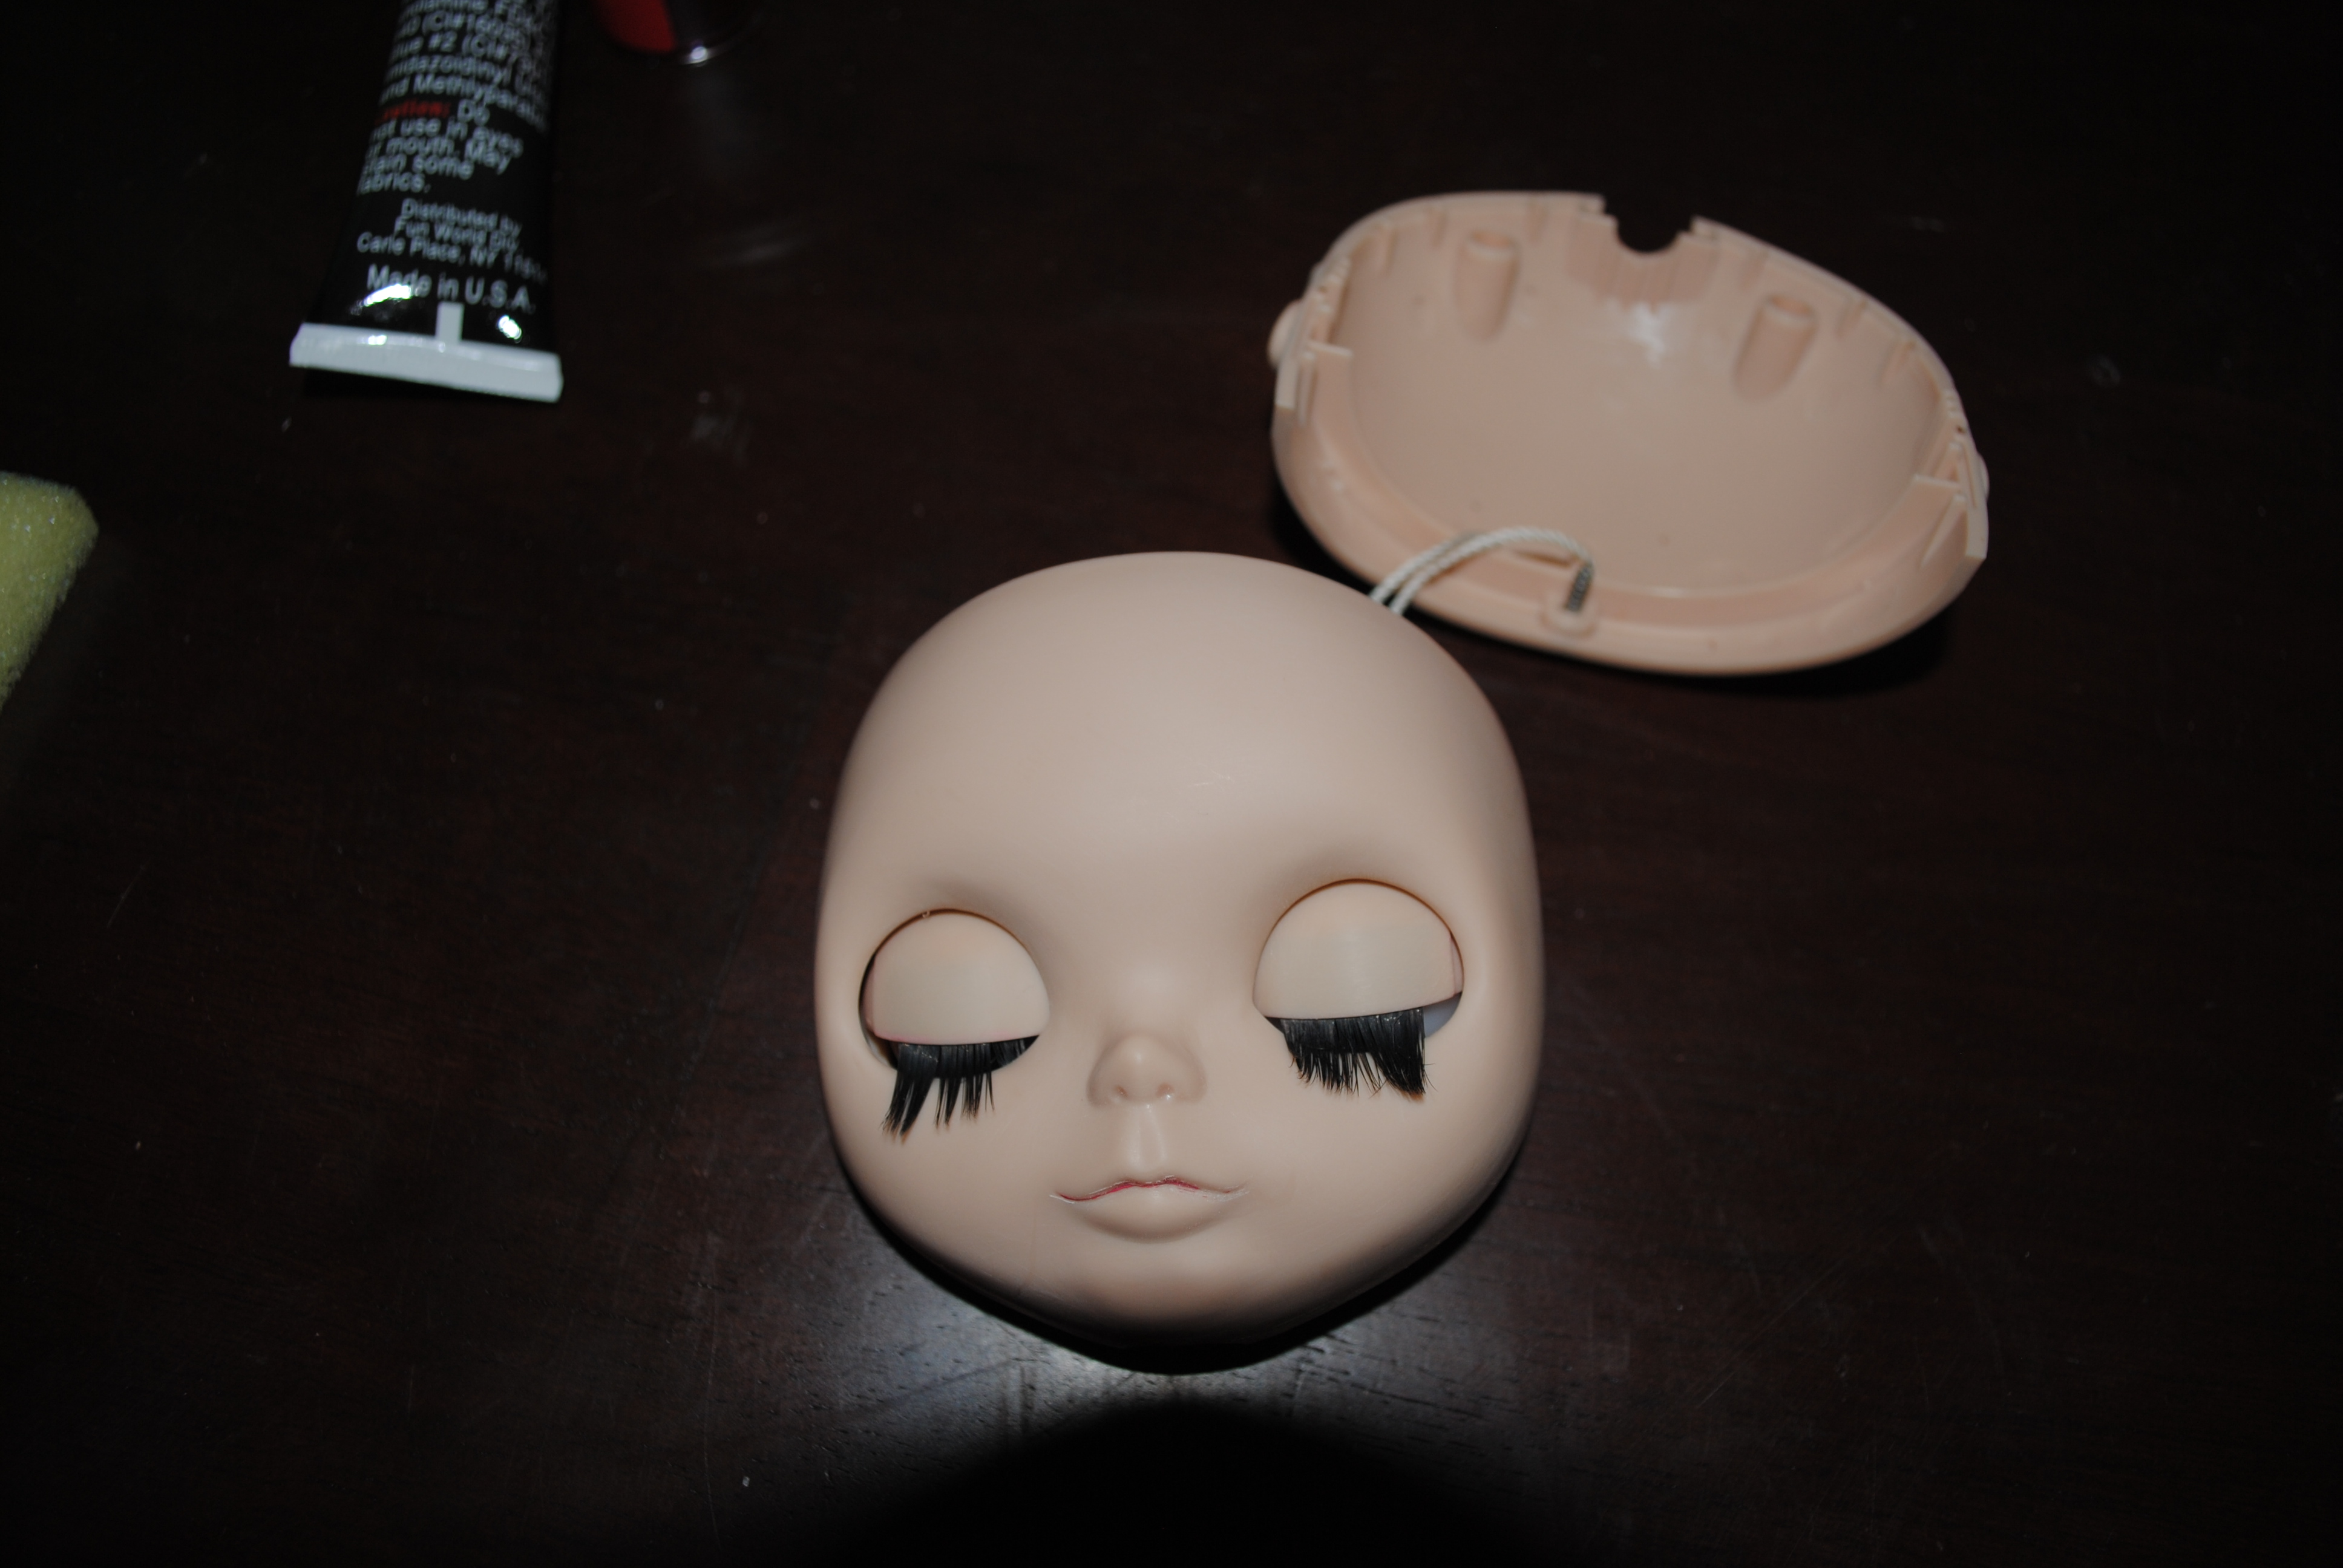
I did also adjust Monique’s eye mechanism to give her “Sleepy Eye”. Blythe dolls do not come with the ability to have a closed eye lid, as when you use their pull tabs it changes their eye color and gaze, but each position keeps their eyes fully open. There are very simple instructions on you tube for this customization technique. I also changed out her eyelashes for some flashy ones.
Monique was a perfect first Blythe for us to fall in love with! We were hooked… and it didn’t take long at all for us to order our next girl!